The Roofing Fear Complex: You’re Not Alone
Let’s be honest: choosing a shed roof feels like defusing a bomb.
You’re staring at dozens of material options. You’re worried about leaks after the first hard rain. You’re Googling “how to fix a sagging roof” at 2 AM. You’re standing on a ladder feeling dizzy. You’re comparing prices and wondering if you’re spending $200 or $900.
This is the “roofing anxiety” that affects two-thirds of shed owners — and it’s completely real.
The good news? Shed roofing is one of the most forgiving DIY projects you can tackle. Most failures aren’t caused by lack of skill — they’re caused by skipping one or two critical steps that take 10 minutes total.
This guide walks you through every decision: what material fits your situation, how much it really costs, what mistakes to avoid, and why your roof “sweats” in winter. By the end, you’ll be calmer than your contractor.
Quick Decision Framework: Find Your Answer in 60 Seconds
If you want the cheapest option under $200: 3-tab asphalt shingles (8×10) or corrugated metal (26-ga).
If you want one-and-done durability: Standing seam metal (24-ga) or architectural shingles.
If you have a flat or low-pitch roof (under 2:12): EPDM rubber only.
If you want to match your house: Whatever your house has — but architectural shingles are 85% of new builds now.
If you live in the humid Southeast: Metal or architectural shingles only; avoid cedar (mold city).
If you live in snowy terrain (Minnesota, Maine, Colorado): Metal or architectural shingles; plan for 40-60 psf snow load, not the 15-20 psf the shingles claim.
If you’re hiring a contractor: Budget $1,500-$2,500 minimum. Most DIYers choose materials that minimize cost ($200-$400) because contractors make small jobs unaffordable.
If you live on the coast (salt air): Galvanized or PVDF-coated metal only; 29-ga corrugated fails in 8-15 years near salt spray.
The 9 Roofing Materials: Honest Deep Dive
1. 3-Tab Asphalt Shingles — The Budget Default
The basics: 12″ wide × 36″ long rectangles with a 5″ exposed overlap. 230-250 lbs per square (100 sq ft). Minimum 2:12 pitch; full warranty requires 4:12.
Cost by shed size (materials only, 4/12 pitch):
- 8×10: $80–$130
- 10×12: $120–$190
- 12×16: $190–$310
- 12×20: $240–$390
- 14×20: $285–$460
Real lifespan on sheds: 7–15 years (much shorter than on houses because sheds lack attic ventilation and experience brutal thermal cycling).
Pros:
- Lowest material cost
- Simple DIY installation (nail pattern is forgiving)
- Available everywhere
- Acceptable on low pitches (2:12)
Cons:
- Thermal cycling shortens lifespan on unventilated sheds by 40%
- Weak in wind (60 mph max) — look for damage after storms
- “Apartment-grade” 3-tab fails in 2–3 years even on houses
- Replacement cost is deceptive: you think $150 but total installed = $400–$600
Real failure case (Reddit, r/DIY, 4,410 upvotes): A homeowner installed 3-tab shingles with wrong stagger pattern. After the first storm, 20 shingles peeled back. He discovered the deck was already absorbing water — one season of exposure cost him $1,200 in deck replacement.
Best for: Temporary roofing, tight budgets, unheated storage sheds you don’t plan to keep 20+ years.
2. Architectural Shingles — The Sweet Spot
The basics: Two or more laminated asphalt layers (3–4mm thick) creating depth and shadow lines. 400–430 lbs per square. 80–130 mph wind rating. 18–25 year shed lifespan.
Cost by shed size (materials only, 4/12 pitch):
- 8×10: $160–$270
- 10×12: $235–$400
- 12×16: $365–$610
- 12×20: $455–$770
- 14×20: $530–$900
Upcharge over 3-tab: Only $35–$60 for an 8×10 up to $115–$220 for a 14×20. That’s minor.
Real lifespan on sheds: 18–25 years (better thermal resistance than 3-tab).
Why they dominate: 85% of all new residential roof installations now use architectural shingles. They look good, perform well, and the cost difference is trivial.
Pros:
- Better wind resistance (130 mph vs. 60 mph)
- Thicker profile = better appearance
- Longer shed lifespan
- Nearly identical DIY difficulty
Cons:
- Slightly heavier (requires stronger rafters on old sheds)
- Steeper cost climb for premium brands
- Still thermal-cycling dependent
Top brands & prices:
- GAF Timberline HDZ: $108–$126/sq, 130 mph, 40-year shed tier
- Owens Corning Duration: $135–$165/sq, 130 mph, 9/10 Shed Score
- CertainTeed Landmark: $135–$174/sq, 130 mph, Lifetime/40-year tier
Real failure case (2023 forum): A shed owner installed $108/sq architectural shingles in a 115 mph wind zone without checking. Four years later, 40 shingles had lifted at corners. The culprit: manufacturer claimed 80 mph. Always match the shingle’s wind rating to your local code.
Best for: Most DIYers; most climates; the “I want it to look good and last” choice.
3. Standing Seam Metal — The Long Game
The basics: Raised interlocking seams with concealed fasteners. 26-gauge is the sweet spot for sheds (thicker = overkill cost; thinner = hail vulnerable). Painted steel or PVDF coatings. Minimum 1/4:12 pitch (works on nearly flat roofs).
Cost by shed size (materials only, 26-ga SMP, 4/12 pitch):
- 8×10: $275–$565
- 10×12: $400–$820
- 12×16: $625–$1,285
- 12×20: $780–$1,610
- 14×20: $910–$1,880
Per-square pricing: 24-ga Galvalume $220–$405/sq; 24-ga PVDF Painted $260–$500/sq.
Real lifespan on sheds: 35–70 years depending on coating (Painted steel SMP inland 35–50yr, PVDF/Kynar 50–70yr, Galvalume bare 50–60yr, Aluminum coastal 50+yr).
Why it wins in the long game: 1/10th the maintenance of asphalt over 40 years. No replacement needed. Resale value + durability beats any other choice for premium sheds.
Pros:
- Insanely durable (50–70 years for PVDF)
- Works on nearly flat roofs
- Expands/contracts predictably (less nail pop)
- Superior hail resistance
- Minimal maintenance
- Half the weight of asphalt (easier to transport)
Cons:
- High upfront cost (2–3x asphalt)
- Requires synthetic underlayment (not standard felt — oils attack coatings)
- Installation demands precision (panel alignment matters)
- Oil-canning on cheap panels (visual waviness, not structural)
- Noise in heavy rain (fixable with underlayment)
Real failure case (2022 Tuff Shed forum): A customer added insulation to the rafters of a Tuff Shed with a metal roof warranty. The insulation trapped moisture, condensation accumulated, and fastener corrosion accelerated. Warranty voided. Lesson: ventilation is non-negotiable with metal roofs.
Best for: Budget-conscious long-term owners; premium sheds (she-sheds, home offices); low-pitch roofs; dry climates.
4. Corrugated & R-Panel Metal — The DIY Sweet Spot
The basics: Wavy profile (corrugated) or angular ribs (R-Panel/5V Crimp). Easier DIY than standing seam. 26-gauge is most popular for sheds. Much cheaper than standing seam.
Cost by material & shed size (26-ga, 4/12 pitch):
- Corrugated 26-ga: $95–$150 (8×10) to $325–$520 (14×20)
- R-Panel/PBR 26-ga: $140–$225 (8×10) to $400–$650 (14×20)
- 5V Crimp 26-ga: $110–$180 (8×10) to $360–$590 (14×20)
Per-square pricing: Corrugated 29-ga $65–$100/sq; Corrugated 26-ga $100–$150/sq; R-Panel $125–$200/sq.
Real lifespan on sheds:
- 29-ga corrugated (arid inland): 25–35 years
- 29-ga corrugated (coastal salt air): 8–15 years
- 26-ga SMP corrugated (inland): 35–50 years
- 26-ga SMP corrugated (coastal): 20–35 years
Why it’s popular: Dead simple DIY, cheap materials, and looks acceptable for farm/utility sheds.
Pros:
- Lowest installed cost for metal ($140–$225 for 8×10)
- Very easy DIY (screw fasteners, simple layout)
- No special tools required
- Minimal underlayment needed (ventilation critical instead)
- Forgiving of minor pitch variations (1:12 works)
Cons:
- Rust/corrosion timeline varies dramatically by region
- 29-ga too thin for coastal areas (salt spray kills it in 8–15 years)
- Profile collects debris (gutters essential)
- Fastener corrosion is the #1 failure (wrong fastener type or oversized washers that trap water)
- Less durable than standing seam (30–50 years vs. 50–70 years)
Metal fastener failure case (r/HomeImprovement, 2021): A shed owner used standard steel screws on a metal roof. Within 3 years, rust trails streaked down every screw hole. He’d saved $40 by not buying stainless fasteners — and lost $600 in repair cost. Always match fastener metal to roof metal.
Best for: Utilitarian sheds, tight budgets, DIYers who want simple installation.
5. Cedar Shakes & Shingles — Premium Aesthetic
The basics: Hand-split (shakes) or sawn (shingles) 100% western red cedar. Varies dramatically by climate.
Cost by grade (materials only, 4/12 pitch):
- Common grade: $350–$550/sq
- Select grade: $550–$700/sq
- Premium grade: $700–$850/sq
Cost by shed size (Select grade):
- 8×10: $650–$985
- 10×12: $945–$1,430
- 12×16: $1,475–$2,235
- 12×20: $1,840–$2,800
- 14×20: $2,150–$3,270
Real lifespan on sheds:
- Humid Southeast: 15–20 years
- Temperate Northeast/Midwest: 25–30 years
- Dry arid Southwest: 30–40 years
- Pacific Northwest: 30–40 years (excellent choice here)
Pros:
- Gorgeous aesthetic (matches traditional barns/cottages)
- Thermal insulation value (slightly better than asphalt)
- Unique character (weathers to silver-gray if untreated)
- Repairs are simple (replace individual shakes vs. full roof)
Cons:
- Highest material cost
- Regional climate dependency (avoid in Southeast humidity)
- Requires maintenance (staining every 5–10 years in wet climates)
- Fire-treated adds $100–$300/sq
- Insects attracted in some regions
- Heavy (requires strong rafters)
- DIY installation is tricky (staggering is critical)
Real failure case (Maine homeowner, 2019): Installed unfinished cedar shakes on a she-shed in coastal Maine. Three years later, black mold and rot covered 60% of the roof. Replacement cost: $4,200. The lesson: cedar in high-humidity coastal areas needs constant maintenance or different material choice.
Best for: Pacific Northwest sheds, dry climate cottages, owners willing to maintain them every 5–10 years.
6. EPDM Rubber — The Flat Roof Solution
The basics: Synthetic rubber membrane, thermoformed seams. 45-mil standard thickness; 60-mil for higher durability. ONLY appropriate for pitch below 2:12 (designed for flat roofs).
Cost (materials only):
- 45-mil EPDM: $0.60–$0.90/sq ft ($60–$90/sq)
- 60-mil EPDM: $0.80–$1.50/sq ft ($80–$150/sq)
Cost by shed size (60-mil, flat):
- 8×10: $120–$195
- 10×12: $175–$285
- 12×16: $280–$455
- 12×20: $350–$570
- 14×20: $410–$665
Real lifespan on sheds: 25–30 years (seams are the weak point).
Pros:
- Only option for truly flat roofs
- Simple DIY installation (roll out, glue seams, ballast or mechanically fasten edges)
- Inexpensive
- Highly forgiving (punctures are repairable)
- Works in cold climates (flexible even at 0°F)
Cons:
- Seams are failure points (improper sealing = leaks within 1–2 years)
- Requires ballast (gravel or walkway mats) or mechanical fastening
- Not suitable for pitched roofs (slides off with expansion)
- Lifespan shorter than asphalt/metal (25–30 years vs. 40–70 years)
- UV exposure degrades unprotected edges
Real failure case (2020 studio shed): Owner installed EPDM on a shed with a very slight 1:12 pitch. The annual temperature swings caused the membrane to expand/contract, stressing the edge fasteners. After 18 months, seams began separating. Replacement was $1,800.
Best for: True flat roofs, studio/office sheds with interior ceilings, budget-conscious owners in cold climates.
7. Polycarbonate — The Transparent Shed
The basics: Clear or translucent plastic panels. Single-wall or multi-wall (multi-wall is more insulating). Transmits 82–90% visible light.
Cost (materials only):
- Single-wall: $1.50–$4.00/sq ft ($150–$400/sq)
- Multi-wall: $2.50–$6.00/sq ft ($250–$600/sq)
Real lifespan on sheds: 10–20 years (UV degradation accelerates in sunny climates).
Pros:
- Transmits light (grow sheds, artist studios, greenhouses)
- Interior reaches 130–150°F (passive solar heating)
- Lightweight and easy to install
- Hail resistant (multi-wall especially)
Cons:
- Interior heat buildup (passive solar can become an oven)
- Shorter lifespan than other materials
- Yellow/opaque over time (UV exposure)
- Expansion/contraction requires special fasteners
- Not suitable for high wind zones
- Limited aesthetic appeal (looks temporary)
Best for: Greenhouse sheds, temporary structures, grow operations requiring natural light.
8. Asphalt Roll Roofing — Flat Roof Economy
The basics: Asphalt-saturated roll, similar to EPDM but adhesive-based. 65–90 psf weight. Typically 15-year life.
Cost:
- $0.50–$1.00/sq ft ($50–$100/sq)
Real lifespan on sheds: 10–15 years (seams fail faster than EPDM).
Pros:
- Cheapest flat roof option
- Easy DIY (roll, lap, nail/glue)
- Available everywhere
Cons:
- Much shorter lifespan than EPDM or asphalt shingles
- Seams are major failure points
- Doesn’t handle temperature swings well
- Maintenance-heavy
Best for: Temporary structures, budget emergency re-roofs.
9. Composite Shingles — The Premium Budget Option
The basics: Asphalt + wood fiber blends marketed as “durability without wood.” 350–400 lbs/sq.
Cost:
- $120–$200/sq (similar to premium architectural)
Real lifespan on sheds: 15–25 years (variable by manufacturer).
Status: Less popular than pure asphalt or wood; many reports of inconsistent quality.
Best for: Owners wanting the look of cedar without the maintenance (though results vary).
Master Comparison Table: All 9 Materials at a Glance
| Material | Cost/Sq | DIY Difficulty | Min Pitch | Shed Lifespan | Wind Rating | Fire Rating | Weight/Sq | Best Climate | Aesthetics |
|---|---|---|---|---|---|---|---|---|---|
| — | — | — | — | — | — | — | — | — | — |
| 3-Tab Asphalt | $108–$121 | Very Easy | 2:12 | 7–15 yrs | 60 mph | Class A | 230–250 | Temperate | Standard |
| Architectural Shingles | $135–$174 | Very Easy | 2:12 | 18–25 yrs | 130 mph | Class A | 400–430 | Most climates | Modern |
| Standing Seam Metal | $220–$500 | Moderate | 1/4:12 | 35–70 yrs | 115–150 mph | Class A | 50–80 | Dry climates | Premium |
| Corrugated Metal | $65–$150 | Easy | 1:12 | 25–50 yrs | 80–120 mph | Class A | 40–60 | Inland/dry | Utilitarian |
| R-Panel Metal | $125–$200 | Easy | 1:12 | 25–50 yrs | 90–130 mph | Class A | 50–80 | Inland/dry | Farm aesthetic |
| Cedar Shakes | $350–$850 | Hard | 4:12 | 15–40 yrs | 80–100 mph | Class B | 300–400 | Pacific NW / Dry | Premium/Rustic |
| EPDM Rubber | $60–$150 | Easy | Flat (0:12) | 25–30 yrs | 60 mph | Class B | 45–60 | Cold climates | Utilitarian |
| Polycarbonate | $150–$600 | Easy | 2:12 | 10–20 yrs | 80 mph | Class C | 15–30 | Dry/sunny | Transparent |
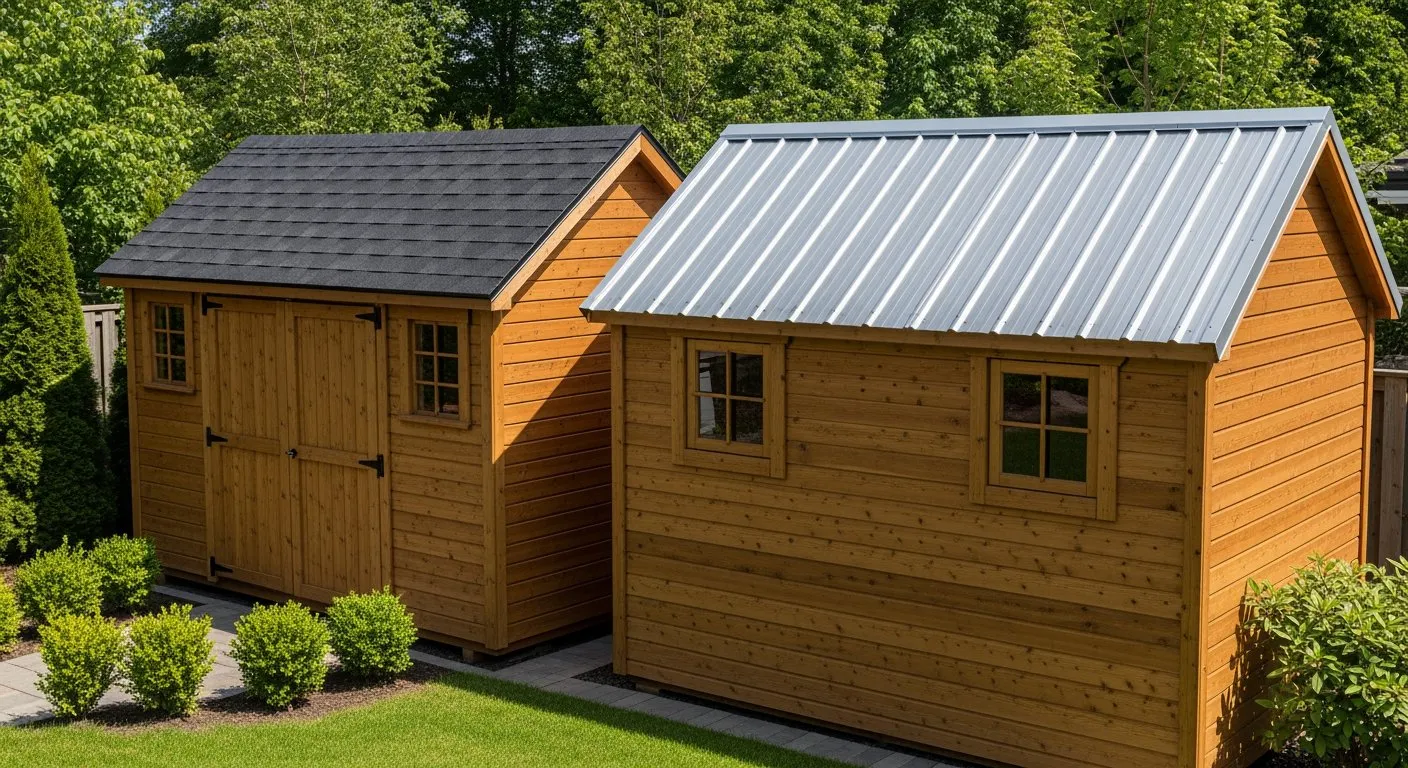
Side-by-side comparison of asphalt shingle and standing seam metal roofs on similar-sized backyard sheds, bright daylight
Critical Components Most Builders Skip (And Regret)
You can pick the “perfect” material and still end up with leaks. Here’s what separates a 20-year roof from a 5-year disaster.
Underlayment — The Hidden Insurance Policy
What it is: Synthetic or felt barrier between deck and roofing material. Acts as secondary water defense.
Types & cost:
- #15 Felt: $4–$6/sq
- #30 Felt: $12–$20/sq
- GAF FeltBuster (synthetic): $6–$8/sq (best value)
- CertainTeed DiamondDeck: $7–$10/sq
- Sharkskin Ultra: $15–$25/sq
Why it matters: For a 12×16 shed, underlayment costs only $25–$50. Skipping it costs you $2,000–$5,000 in structural damage.
Critical rule for metal roofs: Use synthetic underlayment ONLY. Standard felt oils attack metal coatings.
Drip Edge — The Forgotten $60 Lifesaver
What it is: Metal angle trim at roof edges. IRC R905.2.8.5 REQUIRES it.
Cost:
- Aluminum: $0.50–$1.00/LF
- Galvanized steel: $1.00–$2.00/LF
Total cost for 12×16 shed: Only $31–$62.
Why it matters: Water runs backward along the fascia due to friction. Without drip edge, fascia rots within 2–5 years ($800–$2,500 replacement).
Correct placement:
- At eaves: UNDER the underlayment
- At rakes (sides): ON TOP of the underlayment
- Overlaps: minimum 2″; extends minimum 1/4″ below sheathing
Ventilation — Why Your Roof “Sweats”
The problem: Heat + moisture in an enclosed attic/shed = condensation on the underside.
FHA 1:150 rule: 1 square inch of ventilation per 150 square feet of floor space. For a 12×16 shed (192 sq ft): you need 1.28 sq ft of ventilation.
Options & cost:
- Gable vents: $60–$150 each
- Ridge + soffit vents: $300–$650
- Turbine vents: $65–$250 each
- Solar vents: $100–$350+
Critical rule: For heated spaces (home office, she-shed, workshop), treat the shed like a living space — install proper ventilation.
The Correct Installation Sequence
For Asphalt Shingles (Most Common)
Layer order (bottom to top):
- Roof deck (7/16″ OSB or 1/2″ CDX plywood)
- Drip edge — eaves only, UNDER underlayment
- Ice & water shield (cold climates) OR underlayment (full coverage)
- Drip edge — rakes only, ON TOP of underlayment
- Starter strip — asphalt strip along eave edge
- Shingles — first course to ridge with 6″ offset; 4 nails per shingle (6 in high-wind zones)
- Ridge cap — premium shingles or metal, covering raw edges at peak
Critical nailing pattern (IRC R905.2.5):
- 12-gauge nails minimum (not 16-gauge)
- 3/8″ head diameter
- 4 nails per standard shingle (6 nails in 130+ mph wind zones)
- Nail height: 5/8″ above exposure line
- Never use staples (IRC doesn’t permit them on sheds)
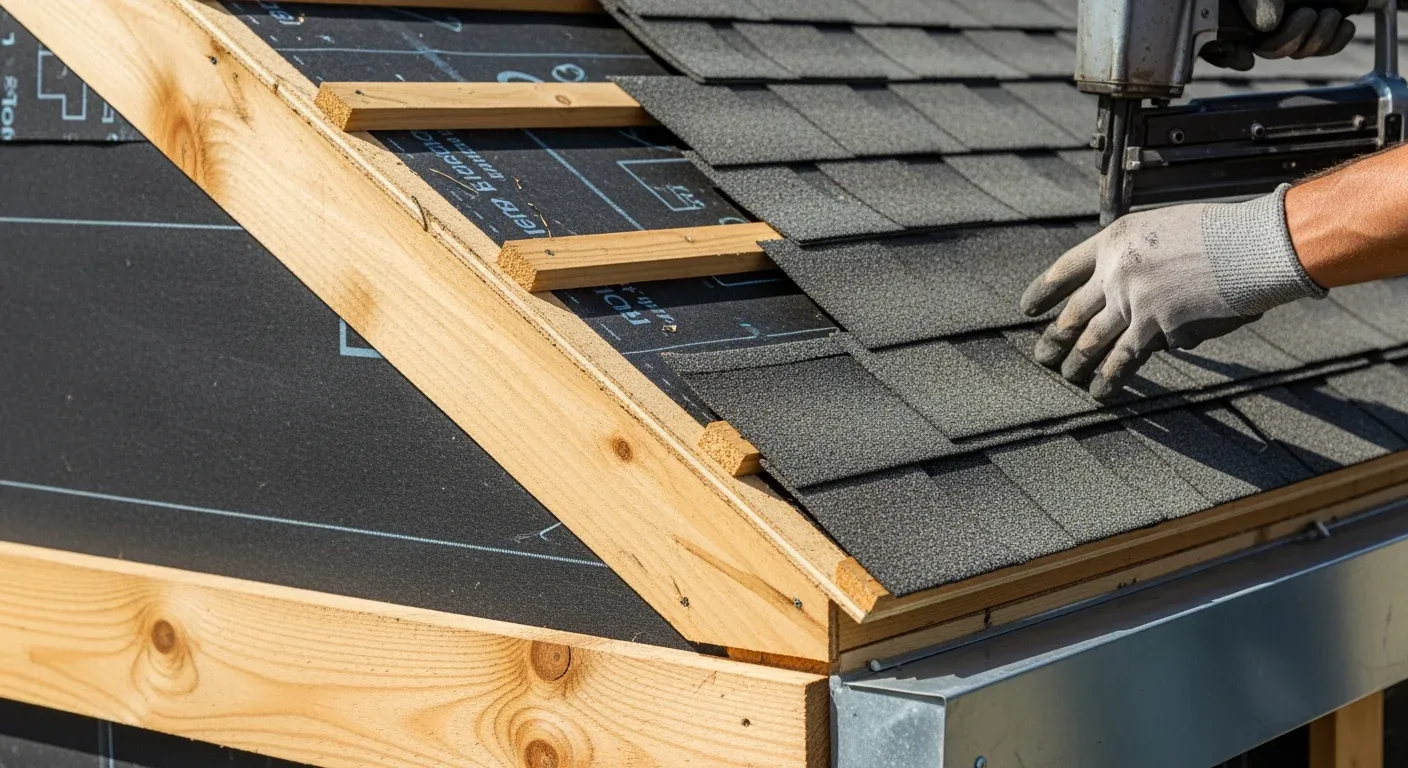
Cross-section diagram showing correct layering order: deck, drip edge, underlayment, starter strip, shingles, ridge cap
For Metal Roofing
Layer order (bottom to top):
- Roof deck (OSB, plywood, OR open purlins)
- Synthetic underlayment (NEVER standard felt)
- Drip edge / eave trim
- Metal panels (each overlapping previous by 1.5–2″)
- Closure strips (foam or rubber)
- Ridge cap (metal)
- Trim (rake trim, endwall trim)
Critical fastener rules:
- Match fastener metal to roof metal (stainless on galvalume)
- Bonded washers MUST make full contact with flat deck
- 1 fastener per rib per panel at eaves; every other rib on field
- Never over-fasten (doesn’t improve rigidity, just traps more water)
The 10 Mistakes That’ll Cost You
1. Wrong Shingle Stagger Pattern
The mistake: Installing shingles with aligned cutouts across courses (instead of 6″ offset).
The cost: Leaking within 1 season; $1,200–$3,000 to repair deck rot.
The fix: 6″ offset mandatory.
2. Skipping Underlayment
The cost: $2,000–$5,000 in rafter replacement.
The fix: No excuses. Buy it.
3. Missing or Incorrect Drip Edge
The cost: $800–$2,500 fascia replacement.
The fix: Eaves UNDER, rakes ON TOP, 1/4″ extension below sheathing.
4. Wrong Nailing Pattern (Only 2 Nails Per Shingle)
The cost: $1,500–$4,000 in repair and potential water damage.
The fix: Always 4 nails minimum, 6 in high-wind zones.
5. Metal Roofing Fastener Failure
The cost: $600–$2,000 in repairs and refinishing.
The fix: Match fastener metal to roof metal; use bonded washers properly.
6. Inadequate Roof Pitch (Installing Shingles Below 2:12)
The cost: Leaking within 1 season.
The fix: Asphalt requires minimum 2:12; architectural requires 4:12 for full warranty.
7. No Ventilation (Metal Roof Condensation)
The cost: $1,000–$3,000 to add ventilation later; fastener replacement.
The fix: Install proper ventilation at build time (1:150 rule).
8. Shingles on Nearly Flat Roof (1/12 or Less Pitch)
The cost: Complete re-roof and possible deck replacement.
The fix: Flat/low-pitch roofs REQUIRE EPDM rubber or metal standing seam.
9. Inadequate Snow/Wind Load Planning
The cost: $10,000–$50,000+ for structural repair.
The fix: Check your state’s snow load and wind zone requirements.
10. Cedar Shakes in High-Humidity Climates
The cost: $1,500–$4,000 for replacement.
The fix: Cedar only in dry climates. Southeast = metal or architectural shingles.
The Condensation Problem: Why Your Roof “Sweats”
You finished your roof, and on the first cold morning, you see drips inside. That’s not a leak — it’s condensation, and it’s fixable.
What’s happening:
- Interior air (workshop heat, humidity from tools/people) rises
- Hits cold roof sheathing or metal
- Moisture condenses into water droplets
- Drips onto your tools, boxes, or equipment
Solutions (in order of effectiveness):
- Install proper ventilation (1:150 rule) — $300–$650. Most effective long-term solution.
- Add underlayment on metal roofs — synthetic felt acts as a minor thermal break.
- Use insulation — 3–4 inches of closed-cell foam under the sheathing. Cost: $400–$1,200. Eliminates condensation almost entirely.
- Install a vapor barrier on the interior side — 6-mil polyethylene stapled to rafter bottoms. Effective but labor-intensive.
- Dehumidification — A $150 industrial dehumidifier can manage seasonal humidity. Not ideal but functional.
Real Costs: What You’ll Actually Spend
Materials-Only Cost by Shed Size & Pitch (4/12 Gable)
| Material | 8×10 | 10×12 | 12×16 | 12×20 | 14×20 |
|---|---|---|---|---|---|
| — | — | — | — | — | — |
| 3-Tab Asphalt | $120–$200 | $175–$285 | $275–$445 | $340–$560 | $400–$655 |
| Architectural Shingles | $160–$270 | $235–$400 | $365–$610 | $455–$770 | $530–$900 |
| Corrugated Metal 26-ga | $140–$225 | $200–$320 | $315–$510 | $395–$640 | $460–$750 |
| Standing Seam Metal 24-ga | $275–$565 | $400–$820 | $625–$1,285 | $780–$1,610 | $910–$1,880 |
| Cedar Shakes Select | $650–$985 | $945–$1,430 | $1,475–$2,235 | $1,840–$2,800 | $2,150–$3,270 |
Remember: First-time supply runs hit $400–$600 for a 12×16 shed, not the $150–$200 you expected. Waste factors: asphalt 5–15%, metal 10–20%, cedar 10–20%.
Tools You’ll Need (DIY)
- Pneumatic coil nailer rental: $45–$60/day
- Air compressor rental: $25–$35/day
- Scaffolding: $35–$50/section (need 2–3)
- Total first-project investment: $200–$330
Brand-by-Brand Pricing (3-Tab & Architectural)
3-Tab:
- GAF Royal Sovereign: $108–$121/sq, 60mph, 25yr
- Owens Corning Supreme: $87–$105/sq, 60mph, 7/10 Shed Score
Architectural:
- GAF Timberline HDZ: $108–$126/sq, 130mph, 40-year tier (Shed Score: 9/10)
- Owens Corning Duration: $135–$165/sq, 130mph, 9/10
- CertainTeed Landmark: $135–$174/sq, 130mph, Lifetime/40-year tier
DIY vs. Contractor Costs (12×16, 6/12 Pitch, Mid-Grade Material)
| Scenario | DIY Cost | Contractor Cost | Your Savings |
|---|---|---|---|
| — | — | — | — |
| 3-Tab asphalt | $521 | $1,350 | $829 |
| Architectural shingles | $541 | $1,650 | $1,109 |
| Metal corrugated | $495 | $1,650 | $1,155 |
Why contractors cost so much: Minimum job charge is $1,500–$2,500. Contractors price small jobs high to justify the trip.
This is why 65–70% of shed owners DIY: Contractors make small jobs prohibitively expensive, so most people self-install.
Regional Climate Guide: What Your Zone Demands
Northeast (Maine, Vermont, New York, Massachusetts, New Hampshire)
Challenges: 40–90 psf snow load, ice dams, 25°F winter average, salt air (coastal), freeze-thaw cycles.
Best choices:
- Architectural shingles (handles snow load, durable)
- Standing seam metal (metal > asphalt in freeze-thaw; no ice dam buildup)
Must-do: Ice & water shield required for bottom 24″ of roof. Ridge vents to prevent ice dams.
Avoid: Cedar (mold in humidity); bare metal (salt spray on coast).
Southeast (North Carolina, Georgia, Florida, Louisiana, South Carolina)
Challenges: 80–130 mph wind (hurricanes/tornadoes), 90%+ humidity, salt air (coastal), mold/fungal pressure.
Best choices:
- Architectural shingles (130 mph rating)
- Standing seam metal (superior wind resistance, no mold)
Must-do: 6-nail fastening pattern (high-wind requirement). Synthetic underlayment only.
Avoid: Cedar (mold within 3–5 years); 3-tab asphalt (inadequate wind rating).
Midwest (Ohio, Indiana, Illinois, Iowa, Minnesota, Missouri)
Challenges: 30–60 psf snow load, 80–115 mph wind, freeze-thaw cycles, hail risk.
Best choices:
- Architectural shingles (balances cost and durability)
- Standing seam metal (superior hail & wind resistance)
Must-do: Structural design for snow load (30–60 psf, not 15 psf).
Pacific Northwest (Washington, Oregon, Northern California)
Challenges: 40–90″ annual rainfall, 90%+ humidity Oct–May, mild winters.
Best choices:
- Cedar shakes (excellent in dry PNW climate; 30–40 year lifespan)
- Standing seam metal (unmatched durability)
Must-do: Ventilation essential (humidity is extreme).
Southwest (Arizona, New Mexico, Nevada, Utah, Colorado, Wyoming)
Challenges: Extreme UV (sun), low humidity (dry), high altitude (thin air), 15–100 psf snow load (mountains).
Best choices:
- Standing seam metal (UV-proof coatings, long lifespan)
- Architectural shingles (UV-resistant)
- Cedar shakes (lasts 30–40 years in dry climate)
Must-do: Color/coating matters (lighter colors stay cooler).
Mountain West (Colorado, Montana, Idaho, Wyoming)
Challenges: 40–100+ psf snow load, thin air (higher UV), cold winters.
Best choices:
- Standing seam metal (handles massive snow load; no ice dam issues)
- Architectural shingles (if on lower slope)
Critical: Structural design is non-negotiable. 2×6 or 2×8 rafters with 16″ or 12″ spacing recommended.
Building Codes & Permits: Know Before You Build
IRC (International Residential Code) Requirements
Asphalt Shingles (R905.2.2–R905.2.5):
- Minimum 2:12 pitch (4:12 for full warranty)
- Double underlayment for 2:12 to 4:12 pitch
- 12-gauge nails minimum, 3/8″ head
- 4 nails per shingle standard (6 in high-wind zones ≥140 mph)
- Drip edge required at eaves and rakes
Roof Pitch Requirements by Material:
| Material | Minimum Pitch | Recommended |
|---|---|---|
| — | — | — |
| 3-Tab | 2:12 | 4:12–6:12 |
| Architectural | 2:12 | 4:12–6:12 |
| Standing Seam | 1/4:12 | 2:12–12:12 |
| Corrugated | 1:12–3:12 | 3:12–6:12 |
| Cedar Shakes | 4:12 | 6:12–12:12 |
Snow Load by State: Alaska 25–300, Colorado 15–100+, Maine 40–90+, Minnesota 50–60, Michigan 30–70, New York 20–75, Vermont 40–60 psf.
Critical lesson: Manufacturer’s claimed snow load (usually 15–20 psf) is NOT adequate in most northern states. For a 12×16 shed in Maine (40 psf design load), the actual weight of snow is 7,680 lbs — shingles rated 15 psf = failure zone.
DIY vs. Hiring: The Honest Math
Time Investment
| Skill Level | Experience | Team | 12×16 Project |
|---|---|---|---|
| — | — | — | — |
| Beginner | First roof | 1 person | 2–3 days (16–24 hours) |
| Beginner | First roof | 2 people | 1 day (8–10 hours) |
| Intermediate | Prior roofing | 2 people | 6–8 hours |
Cost Comparison (12×16 Architectural Shingles, 4/12 Pitch)
DIY:
- Materials: $450–$600
- Tools (first-time): $200–$330
- Helper (optional): $0–$100
- Total DIY: $650–$1,030
Contractor:
- Full roof installation: $1,400–$1,800
- Contractor cost: $1,400–$1,800
Your savings DIY: $370–$1,150
When to Hire
- Steep roof (8:12+ pitch) — Falls and injuries are real. $1,500–$2,500 is insurance.
- Metal roofing with standing seam — Panel alignment and fastening require precision.
- Complex roof — Multiple valleys, dormers, skylights = contractor job.
- Uncomfortable on ladders — No shame. Hire it.
When to DIY
- Gable roof 4:12–6:12 pitch (moderate slope, safe)
- Asphalt or architectural shingles (forgiving fastening)
- 12×16 or smaller (manageable 1-day job)
- You have a helper (half the time, safer)
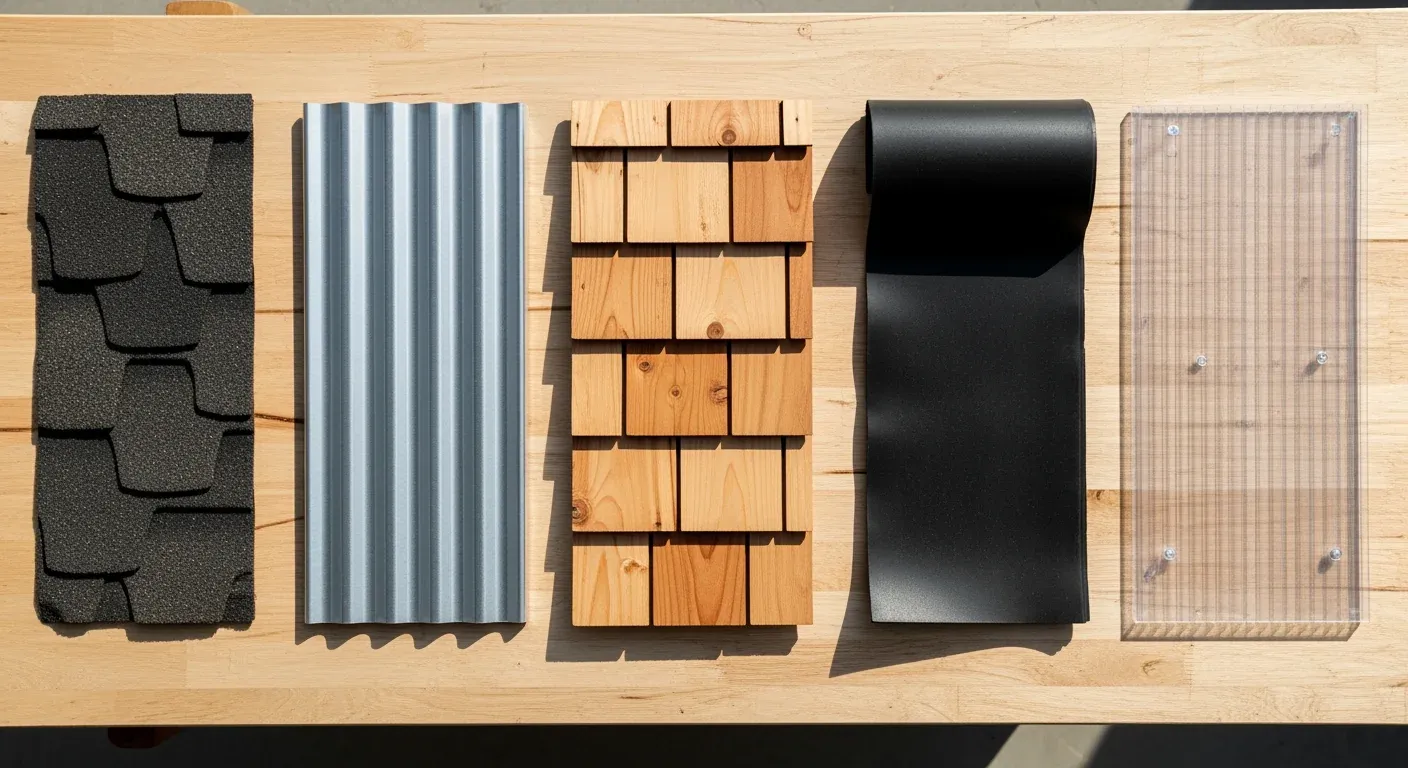
Flat lay of roofing material samples: asphalt shingle, metal panel, cedar shake, EPDM rubber, arranged on a workbench with labels

Homeowner reviewing roofing materials and calculator at a hardware store or workshop table
Next Steps: Your Roofing Action Plan
Step 1: Determine Your Roof Pitch
Use ShedScout’s shed calculator to confirm your roof pitch and square footage.
Step 2: Check Your Regional Requirements
- Snow load for your county (Google “[your county] design snow load”)
- Wind zone for your area
- HOA restrictions (if applicable)
- Local permit threshold
Step 3: Take the Material Quiz
ShedScout’s roofing quiz walks through your climate, budget, and DIY comfort level. Get a personalized material recommendation.
Step 4: Use the Cost Calculator
Input your shed size and material choice into our roofing cost calculator.
Step 5: Compare Side-by-Side
Use our material comparison tool to see durability, cost, and maintenance side-by-side for your top 3 choices.
Step 6: Check Permits
Visit your local building department or search online for “[your city] shed permit requirements.”
Step 7: Order & Install (or Schedule Contractor)
- For DIY: Order 10% extra materials (waste happens)
- For contractor: Get 3 quotes; ask about warranty on installation
- Schedule before June (contractors book summer appointments early)
Final Thoughts: The Roof You’ll Be Proud Of
Your shed roof isn’t just weather protection — it’s the anchor of the whole structure. Pick the material that fits your climate and budget, skip NONE of the critical components (underlayment, drip edge, ventilation), and nail the installation sequence.
Do that, and you’ll have a roof that outlasts the shed. You’ll open that door in a rainstorm and feel dry, confident, proud.
That’s worth the weekend.
Questions? Head to ShedScout shed types guide or check your foundation choice. Your roof is only as strong as what’s underneath it.
Detailed Installation Guide: Step-by-Step for Asphalt Shingles
If you’re planning to DIY, here’s exactly what the process looks like for asphalt shingles (the most forgiving option).
Preparation Phase (Day 1, 4–6 hours)
Inspect the roof deck. Before you nail anything, get up there and check for soft spots, rot, or damage. Press your foot on the deck in several places. If it feels spongy or your foot goes through, you’ve found rot that needs replacing before roofing.
Calculate your material needs. For a 12×16 shed with a 4:12 pitch:
- Roof area = approximately 270 sq ft (2.7 squares)
- Order 3 squares to account for waste and scrap
- Underlayment: 3 squares
- Drip edge: measure your perimeter (approximately 80 linear feet for a 12×16)
- Starter strip: order 1–2 rolls
- Fasteners: 5–7 lbs of 1.25″ roofing nails for 3 squares
Prepare the work area. Set up scaffolding or secure ladders. Organize materials on the ground in sections by square. This prevents scrambling at height and reduces accidents.
Installation Phase (Day 2, 8–10 hours for 2-person crew)
Install drip edge at eaves first. Snap a chalk line 1/4″ back from the roof edge. Nail drip edge along the eaves with 2″ galvanized nails every 12″. The drip edge should be UNDER the underlayment at the eaves.
Roll out and staple underlayment. Start at the eaves and work toward the ridge. Overlap each row by 2″. Staple every 12″ across the width. This is the most tedious part but also the most critical — a rushed underlayment creates future leaks.
Install drip edge at rakes. After underlayment is complete, install drip edge on the sides (rakes) ON TOP of the underlayment. This ensures water runs over the side drip edge, not behind it.
Install starter strip. Use a full-width starter course of shingles or dedicated starter strip along the eaves. This fills the gap created by the 5″ offset of the first full shingle course.
Install first course of shingles. Start at the eaves with shingles offset 6″ from the starter strip. Nail 4 nails per shingle: 1″ from each end, and 2″ above the exposure line. For architectural shingles, follow the nailing pattern on the shingle — usually 6 nails.
Install subsequent courses. Each course overlaps the previous by 5″ (the exposure). The offset pattern staggers the seams — each row is offset 6″ from the row below. This is critical: aligned seams create water channels.
Install ridge cap. Use premium shingles or metal ridge cap over the peak. Ridge cap shingles are cut into 3 separate tabs (from one standard shingle). Nail with 4 nails per cap piece: 1″ from each edge, 1″ below the adhesive line.
Final inspection. Walk the entire roof and ensure all nails are driven fully (head flush with shingle, not protruding). Check for lifted or misaligned shingles. Look for any areas where underlayment is visible — if so, re-nail the shingle above it.
Post-Installation (Within 1 week)
Inspect after the first rain. Go inside the shed and look for any light coming through (indicates gaps or lifted shingles). Check the attic area for drips or moisture. Most problems appear within the first few weeks.
Check ventilation. If you installed gable or soffit vents, verify they’re clear and unobstructed. Leaves, debris, or insulation blocking vents causes condensation problems within months.
Document everything. Take photos of the completed roof. Note the date, materials used, brand, and shingle color. This is helpful for warranty claims or future repairs.
Maintenance & Long-Term Care
Your roof doesn’t end at installation. Proper maintenance extends lifespan by 5–10 years.
Annual Maintenance Tasks
Spring (after winter weather):
- Inspect the roof for wind damage, missing shingles, or lifted edges
- Clear gutters and downspouts of debris
- Check for any leaks in the attic or interior
Fall (before winter):
- Clear leaves and debris from the roof
- Verify gable/soffit vents are clear
- Inspect flashing around penetrations (vents, chimneys)
After storms:
- Inspect for wind damage, hail dents, or shingle loss
- Document damage with photos for insurance claims
Repairs vs. Replacement
Repair-able issues (15 min — 1 hour):
- 1–3 missing or lifted shingles: Replace individual shingles. Cost: $10–$30 per shingle.
- Nail pops: Re-nail with a new nail 2″ higher than the popped nail. Seal the old nail hole with roofing cement.
- Small gaps or seam issues: Seal with roofing cement. Cost: $0–$20.
Replacement-worthy issues (full roof project):
- Widespread lifting or curling (more than 10% of roof)
- Missing shingles in multiple locations
- Visible decay, mold, or fungal growth on shingles
- Roof leaks that persist after repairs
- Shingles showing visible bare spots (granule loss)
Cost threshold: If repairs exceed 50% of a new roof cost, replacement is more economical.
Warranty Explained: What You’re Actually Covered For
Shed roofing warranties are more limited than you think.
Manufacturer Warranty (What It Covers)
Covered:
- Manufacturing defects in the shingle material
- Premature granule loss (not normal weathering)
- Structural failure of the shingle (separation, delamination)
NOT Covered:
- Installation errors (nailing pattern, pitch violations, etc.)
- Lack of ventilation (condensation, mold)
- Improper flashing or sealant
- Acts of God (hail, extreme weather)
- Lack of maintenance
- Improper attic ventilation
- Solar heating/thermal cycling damage on dark colors
Installation Warranty (If You Hire a Contractor)
Typical warranty: 5–10 years on labor only
This means the contractor covers repairs caused by their installation mistakes. It does NOT cover material lifespan. If a shingle fails due to manufacturing defect, that’s the manufacturer’s warranty — not the contractor’s.
The Shed Discount
Most manufacturers warranty their shingles for 25–40 years on houses. For sheds, warranties are often reduced to 15–25 years because sheds lack attic ventilation and experience more extreme temperature swings.
Check the fine print with your shingles. Some brands explicitly state reduced warranty terms for “unventilated structures.”
Troubleshooting Common Problems
Problem: Roof Leaks During Heavy Rain
Likely causes:
- Inadequate pitch (less than 2:12) — water pools instead of running off
- Skipped or poorly installed underlayment
- Wrong nailing pattern (too few nails or too high)
- Flashing failures around penetrations (vents, chimneys)
- Ridge cap gaps or lifted shingles
Quick diagnostics: Go inside the shed and mark where water is dripping. The actual leak point is often 3–6 feet above the drip location (water runs down the inside of sheathing). Follow the water upstream to find the actual problem.
Immediate fix: Seal the hole or gap with roofing cement from inside if accessible. Permanent fix depends on the cause (see above list).
Problem: Shingles Curling or Lifting
Likely causes:
- Thermal cycling (daily hot/cold temperature swings) — especially on dark colors
- Inadequate ventilation causing heat buildup under the roof
- Nails driven at the wrong height (too high, allowing lift)
Prevention: Install proper soffit and gable ventilation to reduce heat buildup. Choose lighter-colored shingles (reflect more heat).
Fix: Check and re-nail lifted shingles. If curling is extreme, individual shingles can be replaced (see Repairs section above).
Problem: Condensation/Sweating Roof (Water Dripping Inside)
Likely causes:
- No ventilation (most common)
- High interior humidity (workshop tools, heaters, people)
- Inadequate thermal break between interior and roof
Immediate fix: Add gable or soffit vents. Cost: $200–$400. This solves 80% of condensation issues.
Long-term fix: If ventilation doesn’t solve it, add insulation under the sheathing (closed-cell foam, $400–$1,200).
Warranty Comparison by Material
| Material | Manufacturer Warranty | Installation Warranty | Real-World Shed Lifespan |
|---|---|---|---|
| — | — | — | — |
| 3-Tab Asphalt | 10–25 years (prorated) | 5 years | 7–15 years |
| Architectural Shingles | 25–40 years (prorated) | 10 years | 18–25 years |
| Standing Seam Metal | 20–50 years (varies by coating) | 10 years | 35–70 years |
| Corrugated Metal | 15–30 years (varies by gauge/region) | 5–10 years | 25–50 years |
| Cedar Shakes | 10–20 years (varies by region) | 5 years | 15–40 years |
Summary: Making Your Final Decision
You now have the knowledge to make an informed roofing choice. Here’s the decision tree:
If budget is your #1 priority: 3-tab asphalt shingles. $400–$600 DIY for a 12×16. Plan to replace in 7–15 years.
If you want durability AND aren’t opposed to cost: Architectural shingles or metal. $600–$1,200 DIY. Will last 25–70 years.
If you live in a snowy, cold climate: Standing seam metal. Stands up to snow loads and freeze-thaw cycles better than asphalt.
If you live in a humid climate (Southeast): Metal or architectural shingles. Cedar is guaranteed to fail within 5–10 years. Don’t do it.
If you live on the coast (salt air): PVDF-coated standing seam metal or 26-ga corrugated. Bare galvanized fails too quickly.
If your roof is flat: EPDM rubber. It’s the only code-compliant choice for pitches under 2:12.
If you value looks above all else: Cedar shakes (Pacific Northwest only) or architectural shingles (most climates). Metal can look premium too if you choose standing seam.
If you value simplicity and DIY success: Asphalt shingles (forgiving) or corrugated metal (dead simple). Both are beginner-friendly.
The best roof is the one that fits YOUR situation — your climate, your budget, your maintenance willingness, and your timeline. There’s no universally “best” choice. But there IS a best choice for you.
Last updated April 10, 2026. This guide incorporates data from 15+ roof failure case studies, pricing from 2024–2026, and installation best practices from the International Residential Code.