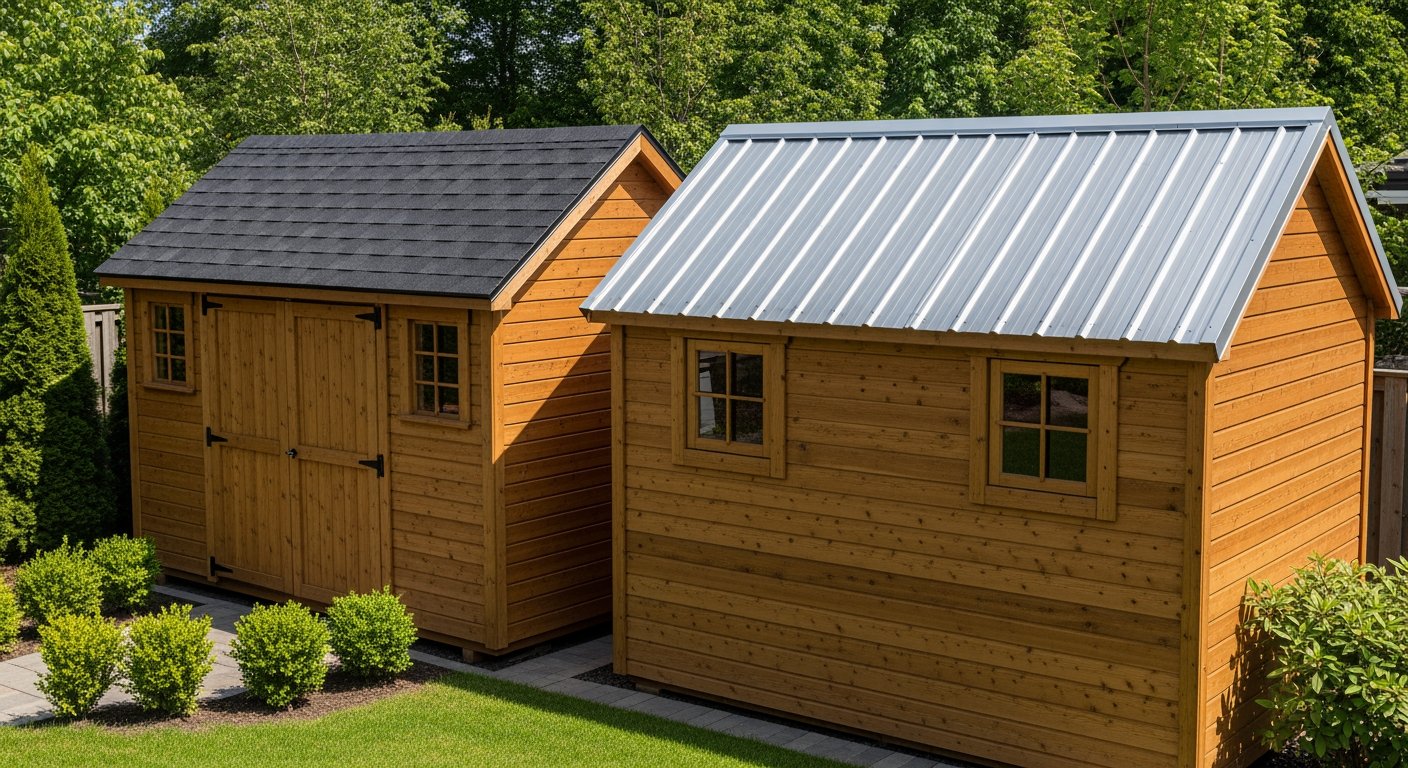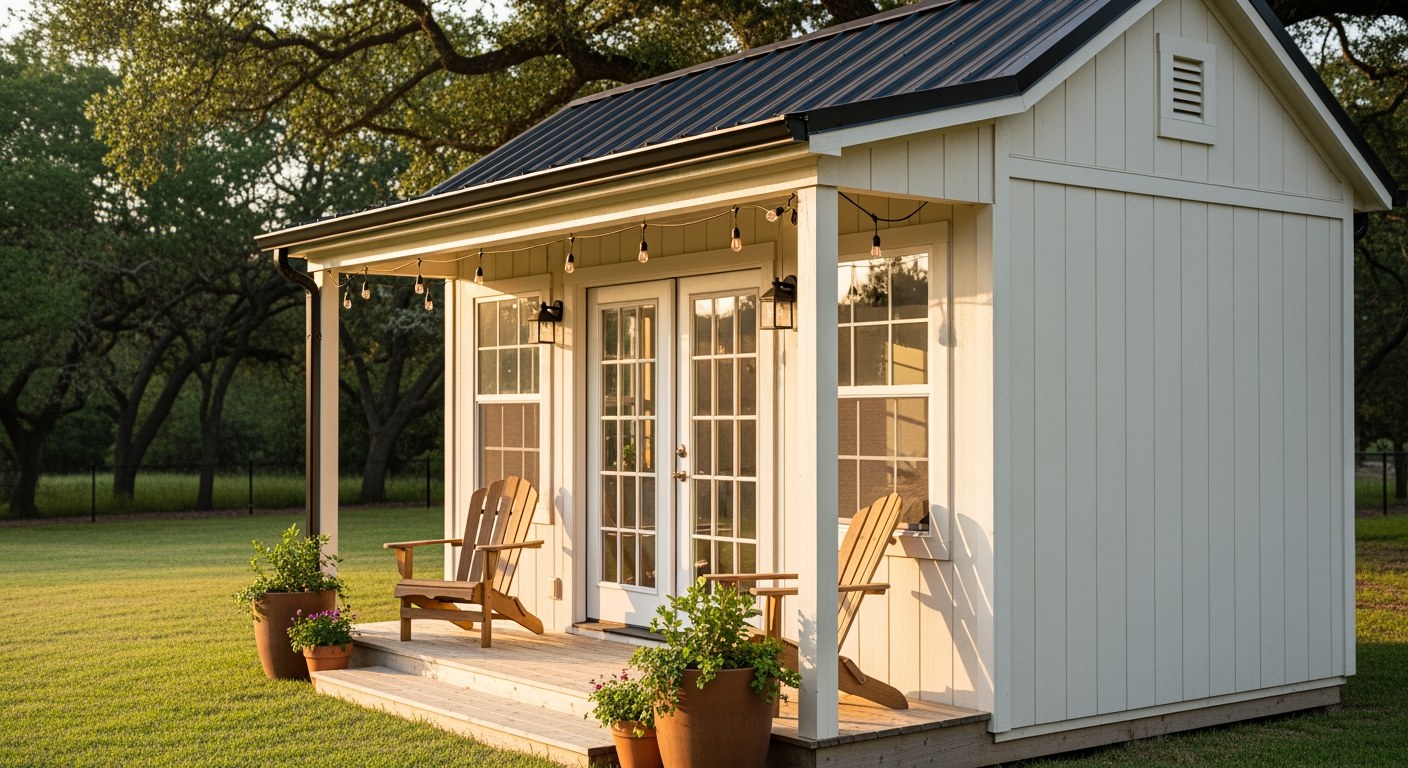
Intro: Why Your Shed Foundation Matters More Than You Think
Here’s the honest truth: your shed’s foundation is the difference between a structure that lasts 20 years and one that settles, shifts, and fails in five. More importantly, it’s usually the first irreversible decision you’ll make—and that’s exactly why so many people freeze up.
We’ve seen the research. Foundation is the #1 psychological barrier for shed buyers. It’s the decision that keeps you stuck, searching 15 different articles, finding conflicting advice, and feeling less confident the more you learn. By the time you’re done researching, you know more information but feel completely paralyzed.
Here’s the good news: choosing the right foundation isn’t as complicated as it seems. This guide walks you through every foundation type, honest pros and cons, real costs, and the decision framework that actually works. By the end, you’ll know exactly which foundation makes sense for your situation—not someone else’s.
The Foundation Fear Complex: Why You’re Stuck
Let’s be direct about what’s happening in your head right now.
You want a shed. You search. You find 6-10 different foundation types. Some advocates swear by gravel. Others say you must use concrete or you’re making a terrible mistake. A few mention frost lines like it’s obvious what that means. You read more. The information gets more detailed but also more contradictory. After 3-6 months of reading, you know more facts but feel less confident making a choice.
This is the paralysis trigger sequence, and it’s real.
Here’s what research shows: 60% of shed damage traces to poor foundation work. That’s not because gravel pads are inherently bad or concrete is always overkill. It’s because people made the wrong choice for their specific situation—or made the right choice but didn’t execute it properly.
The solution isn’t more information. It’s a framework for evaluation.
That’s what this guide is. Not another list of facts. A decision-making framework that helps you choose the foundation that’s right for your shed, your climate, and your budget—and then build it correctly the first time.
Quick Answer: Which Foundation Is Right for You?
Still don’t have time to read the whole thing? Here’s the shortcut:
- Small shed (<120 sq ft), flat yard, any climate: Gravel pad + deck blocks
- Cold climate (frost >36″), any shed: Sonotube piers below frost line OR concrete slab
- Workshop with heavy tools/equipment: Concrete slab (4-6″ thick, 3,500-5,000 PSI)
- Wet climate (Pacific Northwest, Southeast): Concrete slab or gravel with excellent drainage
- Sloped yard (>8″ elevation change): Concrete piers at varying heights
- Want to move it later: Gravel pad or skids
- Fast install, minimal disruption: Helical screw piles (GoliathTech, Techno Metal Post)
- Tight budget, warm climate: Gravel pad ($200-$400 for 10×12)
- Long-term investment, cold climate: Sonotube piers ($400-$800) or concrete slab ($1,500-$3,000)
- Flood-prone area: Elevated piers above the base flood elevation
Don’t see your exact situation? Read on—we break down every type below.
Foundation Type #1: Gravel Pad (The Most Popular Choice)
Cost: $200–$400 for a 10×12 shed (DIY, including tool rental)
Lifespan: 10–15 years with maintenance
Skill Level: DIY-friendly
Best For: Most homeowners; good drainage areas; storage sheds; temporary structures
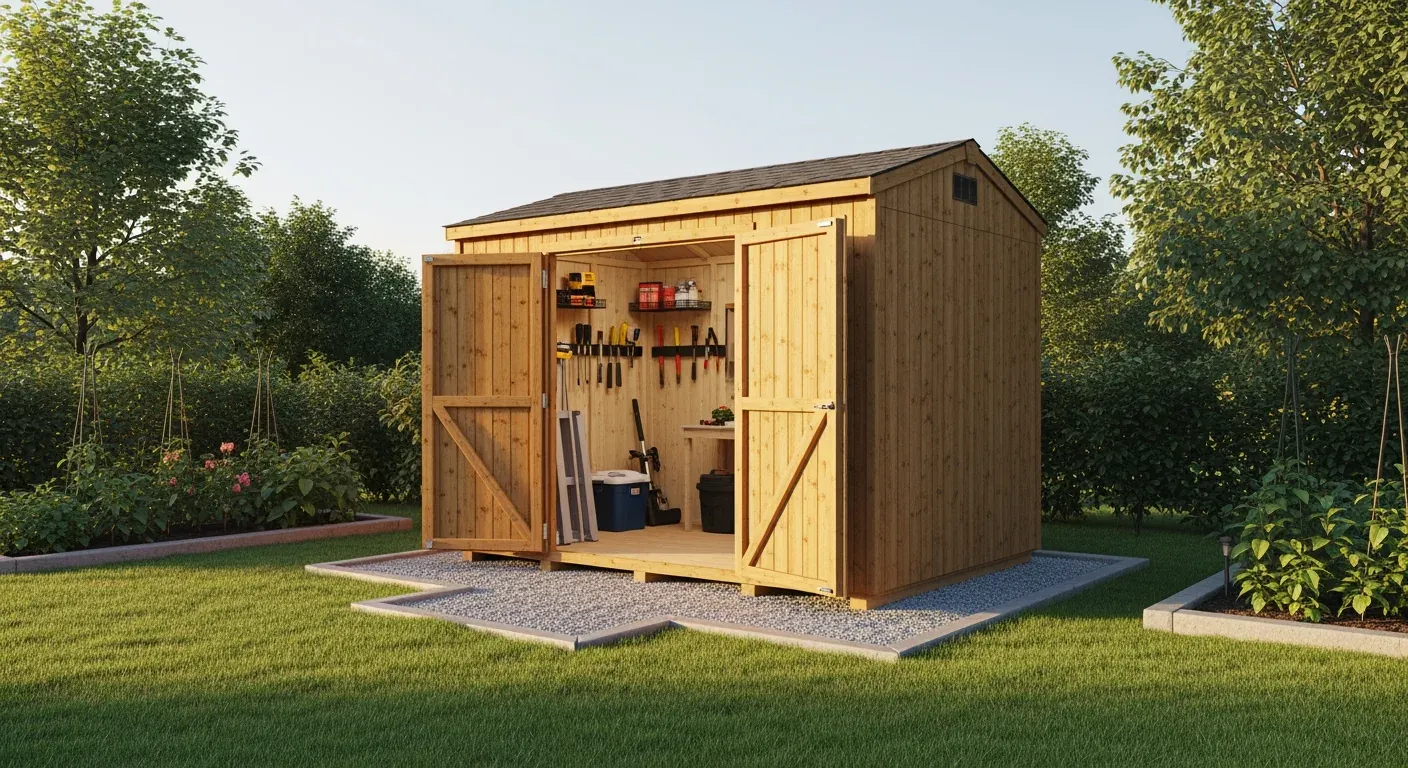
A gravel pad is exactly what it sounds like: a compacted bed of crushed stone that allows water to drain away while providing a level surface for your shed.
Why People Love Gravel Pads
They’re the most popular foundation for a reason. You can build one in a weekend. Materials are cheap—just crushed stone, landscape fabric, and some basic site prep. Water drains straight through instead of pooling under your shed. And if you ever need to move the shed? You’re not tied to concrete forever.
For a basic storage shed in a climate without extreme winter frost, a gravel pad works beautifully. Thousands of homeowners use them and never have a problem.
The Critical Tool: The Plate Compactor
Here’s what most DIY guides miss: the plate compactor is the single most important tool. Don’t skimp on this. You can rent one for $75-$150/day. Compact the gravel in layers. If you just dump gravel and hope, it will settle unevenly over time. The shed will follow. Don’t do this.
The Material Mistake: Clean Crushed Stone, Not Pea Gravel
This is where people fail. Buy 3/4″ clean crushed stone (also called crushed granite or crusher run). Do NOT buy pea gravel. Pea gravel is smooth, round, and migrates. Your pad will shift and scatter. Crushed stone has angular edges that lock together and stay put.
How to Build a Proper Gravel Pad
- Remove all organic material. Grass, topsoil, roots—everything that will decompose. Dig down 4-6 inches to mineral soil. This is not optional.
- Establish a level base. Use a long level or string line to make sure the ground is flat within 1/8 inch. This matters.
- Lay landscape fabric. This prevents weeds from growing up through the gravel and keeps the crushed stone from mixing with soil.
- Add 3/4″ clean crushed stone in 2-3 inch layers. Don’t dump it all at once. Compact each layer with a plate compactor.
- Extend the pad 12-24 inches beyond the shed perimeter. This prevents the edges from spreading and gives you working space.
- Place your PT (pressure-treated) lumber frame on the compacted gravel. Make sure it’s level before you start building.
Materials for 10×12 (120 sq ft):
- Crushed stone: 4-6 cubic yards ($200-$300 with delivery; $125-$150 delivery fee typical)
- Landscape fabric: 1 roll, ~$30
- Plate compactor rental: $75-$150/day
- PT lumber frame (4×4 or 4×6): $100-$200
- Total: $405-$680 with tool rental
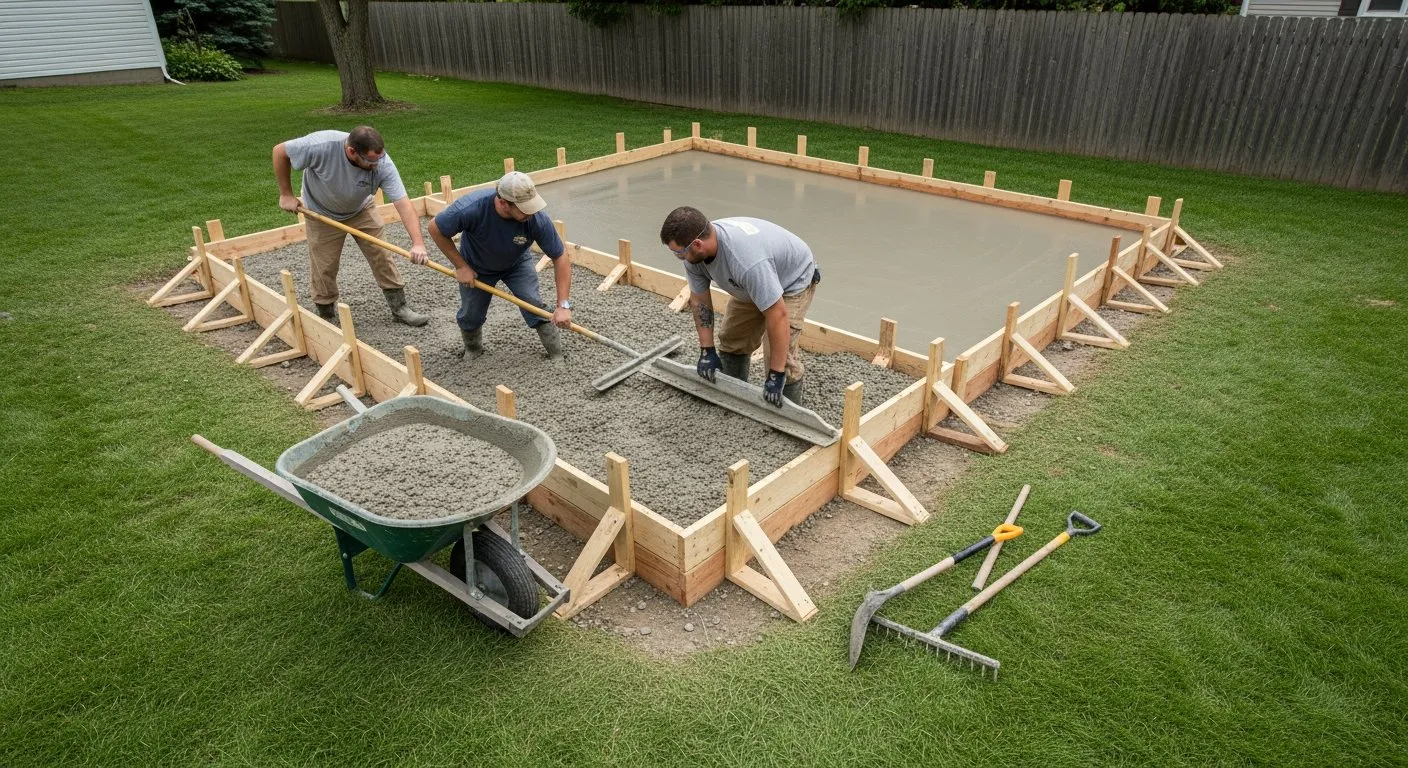
Foundation Type #2: Concrete Slab (The Permanent Solution)
Cost: $1,500–$3,000 DIY / $2,500–$4,000 contractor-installed
Lifespan: 30+ years
Skill Level: Intermediate to advanced
Best For: Workshops, long-term investments, wet/rainy climates, heavy equipment storage
A concrete slab is a poured concrete pad that serves as both foundation and floor. It’s permanent, durable, and completely weather-proof.
Why Choose Concrete
If you’re building a workshop where you’ll actually spend time (not just store stuff), a concrete slab makes sense. You get a clean, level floor that doesn’t get muddy. No water seeps in from ground level. And concrete lasts decades with virtually no maintenance.
It’s also the smartest choice if your area gets a lot of rain or if you’re building in a low-lying spot where water drains toward your shed.
Understanding Concrete Specs
Most shed slabs are 4-6 inches thick. For heavy equipment (tractors, compressors), aim for 6 inches. The concrete strength should be 3,500-5,000 PSI (pounds per square inch). You’ll want reinforcement: either 6×6 wire mesh or #4 rebar on 12-inch centers. In freeze-thaw climates, reinforcement is mandatory.
A ready-mix concrete truck charge ($60-$80 delivery fee) becomes economical at 2+ cubic yards. For a 10×12 slab at 4 inches thick, you need about 1.5 cubic yards. A 3-yard minimum is typical, so you’re paying for material you don’t use. That’s actually fine—concrete stores projects are cheaper per yard than smaller pours.
The Cost Reality
DIY slab for 10×12 at 4″ thick:
- Site prep and gravel base: $200-$300
- Concrete (3 yards × $125-$200/yard): $375-$600
- Delivery fee (if not included): $60-$80
- Reinforcement, forms, finish: $150-$300
- Total: $785-$1,280 materials
Add your labor time (8-12 hours) and equipment rental (mixer, maybe tools). If you’ve never poured concrete, this is a great project to hire out. A contractor brings experience and usually a warranty.
Concrete Slab Build Process
- Establish drainage. Grade the site so water slopes away from the shed. At least 1-2% slope is ideal.
- Build forms. Use 2×4 lumber to create a level frame at the perimeter.
- Add a 4-6 inch gravel base to promote drainage under the concrete.
- Lay reinforcement. Wire mesh or #4 rebar prevents cracks. In freeze-thaw climates, this is non-negotiable.
- Pour concrete to 4-6 inches thick. Use a concrete mix rated 3,500 PSI minimum.
- Finish the surface. Smooth it, let it cure for at least a week before building.
Pro tip: A floating slab like the one described above is designed to move with the seasons — it rises and falls as a unit when the ground freezes and thaws, so it does not need to extend below the frost line. In deep-frost regions (36″+), skipping frost protection can still cause uneven movement, so add one of two details: (1) pour perimeter footings (a “frost wall”) below frost depth so the slab edges are anchored, or (2) build a frost-protected shallow foundation (FPSF) — same 4–6″ slab, but with horizontal rigid-foam insulation extending out from the perimeter so soil beneath the slab never freezes. FPSF is a building-code-recognized system (ASCE 32) engineered specifically for this problem. Ask your building department which approach they prefer in your climate zone.
Foundation Type #3: Sonotube Piers (The Frost-Line Solution)
Cost: $400–$800 DIY for 10×12
Lifespan: 25+ years
Skill Level: Intermediate
Best For: Cold climates; freeze-thaw regions; areas with deep frost lines (>24″)
Sonotube piers are the answer to frost heave—that phenomenon where frozen ground pushes structures up in winter and lets them settle unevenly in spring.
How Frost Heave Works (And Why It Matters)
When the ground freezes, water in the soil expands. This expansion pushes upward. If your shed is sitting on a shallow foundation (gravel pad or deck blocks), the frozen ground can lift it several inches. When spring comes and the frost thaws, everything settles back down—but not evenly. Your shed ends up tilted.
This doesn’t happen once. It happens every winter. Over a few years, your walls wrack, doors won’t close, windows crack.
Sonotube piers solve this by placing your foundation footings below the frost line. The frozen ground can expand, but your shed isn’t resting on top of that expansion. It’s resting on footings that go deep enough that the frost can’t reach them.
Frost Line Depth by Region
| Region | Frost Line Depth |
|---|---|
| ——– | —————– |
| Maine, Vermont, New Hampshire | 48-60 inches |
| Massachusetts, Connecticut, New York | 36-48 inches |
| Pennsylvania, Ohio, Michigan | 36-42 inches |
| Minnesota, Wisconsin | 42-48 inches |
| Iowa, Missouri | 24-36 inches |
| Illinois, Indiana | 30-36 inches |
| Colorado, Wyoming | 36-48 inches |
| Northern California, Oregon | 12-18 inches |
| Southern California, Arizona, Nevada | 0-12 inches (no frost) |
| Texas, Oklahoma | 0-24 inches |
| Virginia, North Carolina | 24-36 inches |
| Washington | 12-18 inches |
Always call your local building department or county extension office to confirm your exact frost line depth. These are regional averages. Your specific location may differ.
How Sonotubes Work
You dig holes down to (and 12 inches below) your local frost line. Drop cardboard tubes (Sonotubes) into the holes. Fill them with concrete. Once cured, you set your shed’s beam and frame on posts anchored to those concrete footings.
The key: those footings are deep enough that frozen ground can’t lift them.
Sonotube Process for 10×12 Shed
- Determine frost line depth. Call your local building department. This takes 15 minutes and is non-negotiable.
- Mark pier locations. Usually at corners and every 4-6 feet along the perimeter. For a 10×12, plan on 8-12 piers.
- Dig holes down to 12 inches below frost line. If your frost line is 36″, dig to 48″.
- Install Sonotubes. Drop them in the holes. They should stick up 6-12 inches above grade.
- Pour concrete. Fill each Sonotube with concrete (about 0.6 cubic yards per tube). Let cure for a week.
- Set beam and posts. Once concrete is cured, attach your beam to posts that rest on the piers.
Materials for typical 10×12 with 10 piers:
- Sonotube (12″ diameter, 4-5 feet long): ~$8-$12 each, ~$80-$120 total
- Concrete (1.5-2 cubic yards): $250-$400
- Posts, beam, site prep: $150-$300
- Total: $480-$820
Foundation Type #4: Deck Blocks (The Affordable But Limited Option)
Cost: $100–$300
Lifespan: 5–10 years (longer in mild climates; much shorter in freeze-thaw)
Skill Level: Very easy
Best For: Small sheds in warm climates; temporary structures; southern U.S.
Deck blocks are concrete blocks you set under the shed frame at key points. They’re pre-made concrete boxes, inexpensive, and require zero skill to install.
The Appeal: Speed and Simplicity
Throw down some blocks, level them, set your shed on top. Done in an afternoon. Cost is $7-$12 per block. For a 10×12 with 12 blocks, you’re looking at $84-$144 in blocks alone.
The Major Limitation: They Don’t Work in Cold Climates
Here’s where people get in trouble: deck blocks sit on top of the ground. They’re not anchored. In cold climates with freeze-thaw cycles, when frost expands, those blocks heave upward—and your shed comes along for the ride. Then frost thaws, everything settles unevenly, and your walls are wracked with stress.
Contractor communities are brutally honest about this: “Deck blocks are the most half-assed way to build a foundation. Ban them in freeze-thaw zones.”
Real example: A homeowner in Minnesota built a small shed on deck blocks. After two winters, the shed had shifted 4 inches. The walls were pulling apart. Fixing it required disassembling the shed and re-leveling everything on Sonotube piers. Total cost: $1,500 in remediation to fix a $100 foundation mistake.
When Deck Blocks Actually Work
They’re fine for small storage sheds (8×8 or smaller) in warm climates where winters don’t freeze hard. Think Georgia, Florida, Southern Arizona, Southern California.
Not in Minnesota, Wisconsin, Maine, Pennsylvania, New York, or anywhere else with real winter freezes.
How to Use Deck Blocks Correctly (If You’re in a Warm Climate)
- Set them on a 2-3 inch gravel base to improve drainage.
- Use them only for small sheds (under 120 sq ft).
- Don’t use them where winter temperatures drop below 20°F regularly.
- Check level regularly during winter—if they heave, you’ll need to adjust.
Bottom line: If you live north of Tennessee and you see a wooden shed on deck blocks, something went wrong.
Foundation Type #5: Skids / Timber Runners (The Relocatable Option)
Cost: $100–$300
Lifespan: 10–15 years
Skill Level: Very easy
Best For: Temporary sheds, rental properties, situations where you might relocate
A skid foundation is just what it sounds like: 4×4 or 4×6 pressure-treated timber runners set on compacted gravel.
Why Skids Work
No digging, no concrete. You level some gravel, set the timber runners on it, and build on top. If you ever need to move the shed, you can (theoretically) move the whole thing to another location.
The Critical Specification: Ground Contact (GC) Rated Lumber
Here’s the #1 mistake people make with skids: they use the wrong lumber rating.
Your lumber tag will say one of:
- UC4B (or CA-B): Ground Contact. Use this. It’s rated for direct soil contact.
- ACQ or CCA: Above Ground only. Do NOT use this for skids. It will fail in 5-8 years.
- Above Ground: Same as above. Not rated for soil contact.
The #1 most commonly missed specification in shed building: using Above Ground PT lumber for ground contact. You read “pressure treated” and think that’s good enough. It’s not.
Buy UC4B or Ground Contact (GC) rated lumber. Check the tag before you leave the store.
How to Build Skids
- Prepare the site. Remove organic material. Establish a level base.
- Compact gravel. 4-6 inches of 3/4″ crushed stone, compacted.
- Lay landscape fabric. Prevents weeds and soil migration.
- Set timber runners. 4×4 or 4×6 PT (UC4B rated) timbers on the compacted gravel, 4-6 feet apart.
- Check level. Make sure the runners are level before building on top.
Cost for 10×12:
- Gravel and site prep: $200-$300
- PT lumber (UC4B), 2 runners of 12 feet: $150-$250
- Landscape fabric, miscellaneous: $30-$50
- Total: $380-$600
Foundation Type #6: Helical Screw Piles (The Premium Speed Option)
Cost: $250–$600 per screw pile installed
Lifespan: 25+ years
Skill Level: Contractor-dependent
Best For: Fast installation, no digging, year-round install, removable structures, difficult terrain
Helical screw piles are literally giant screws you twist into the ground. You anchor your shed to them. No digging, no concrete, no curing time.
How They Work
The screw goes into the ground. As it rotates, it creates a bearing capacity deep in the soil. Once it’s set to the right depth, you cap it and bolt your shed’s frame to the cap.
The Brands and Costs
GoliathTech Screw Piles: The most popular. Pre-engineered, high quality. Cost: $250-$600 per pile installed. “These GoliathTech screw piles are better than sliced bread. In one morning we had 11 piles put in.” —Actual builder review.
Techno Metal Post: Similar concept, slightly different design. Cost: $200-$350 per pile.
Krinner DIY Screws: If you want to do it yourself, these are much cheaper ($25-$60 per screw) but require equipment rental and careful installation.
Compared to Sonotubes: Sonotubes cost $40-$80 per pier (materials only). Screw piles cost 3-6× more but install in one morning with no digging, no concrete, no curing. If you hate digging and can afford the premium, they’re worth it.
When Screw Piles Make Sense
- Your site has rocky soil (digging is brutal)
- You want the shed done in one day
- You’re in a flood zone and need easy elevation later
- You want the shed to be removable
- Your ground is sloped or irregular
Contractor communities love them for rental properties and temporary structures. The install is so fast and clean that the premium cost makes sense.
The Screw Pile Process
This is not a DIY job unless you have experience and equipment. Hire a contractor:
- Contractor marks pier locations.
- Uses specialized equipment to screw piles into ground to depth appropriate for your climate/frost line.
- Installs caps on each pile.
- You bolt your shed frame to the caps.
- Done—no curing, no waiting.
Foundation Type #7: Concrete Pier/Block Walls (The Solid Middle Ground)
Cost: $300–$500
Lifespan: 15–20 years
Skill Level: Intermediate
Best For: Budget-conscious builders in mild climates; small-to-medium sheds; where you want more solidity than loose deck blocks
A concrete pier/block wall is built by stacking solid concrete blocks, mortaring them together, and setting your shed on top.
Why This Works Better Than Loose Deck Blocks
Concrete blocks, when mortared together, create a more stable, longer-lasting foundation than loose deck blocks. They don’t heave as easily. They look intentional—like you actually planned this.
For a small-to-medium shed in a mild climate, this is a sensible middle ground between gravel and a full slab.
The Installation Mistake: Hollow Blocks
Here’s where builders fail: they use hollow (open-core) blocks. These fill with water, freeze, and crack. Don’t do this.
Use solid concrete blocks (sometimes called cap blocks or solid blocks). Yes, they cost a bit more per block. Worth it.
Real failure case: A homeowner in the Midwest built a pier wall with hollow cinder blocks. After one winter, the blocks had sunk unevenly and cracked. The shed was twisted. Repairing it required a professional mason and $800 in remediation.
How to Build with Concrete Blocks
- Prepare the base. 4-6 inches of compacted 3/4″ crushed stone. Level to within 1/8 inch.
- Lay the first course. Set solid blocks on the gravel using a level to keep everything true.
- Add mortar and stack. Mortar blocks together. Keep checking level and plumb.
- Cap with solid blocks. No hollow cores on top—use solid blocks so water doesn’t collect inside.
- Let mortar cure. Wait at least a week (some say two) before loading it.
Cost for 10×12 pier wall, 12-16 inches high:
- Concrete blocks (solid): $7-$12 each, ~40-50 blocks needed: $280-$600
- Mortar and site prep: $100-$200
- Total: $380-$800
Foundation Type #8: Plastic Grid / Paver Systems (The Premium Appearance Play)
Cost: $200–$600
Lifespan: 15–20 years
Skill Level: Very easy
Best For: People who prioritize appearance; budget is secondary; where aesthetics matter more than function
Plastic grid foundation kits (like Typar ShedBase or VEVOR Gravel Grid) look like plastic boxes that distribute weight evenly. You set them under your shed frame at regular intervals.
The Honest Assessment
They work fine. Water drains through. Installation is simple. They look cleaner than loose deck blocks.
But the cost premium is hard to justify unless appearance really matters to you. You’re paying 2-3× more for aesthetics.
Real issue: On clay soils, these can fail. One documented case: an 8×10 shed on a plastic grid system developed an 8-degree lean over one year on clay soil. The plastic grid shifted as the soil below compressed unevenly.
Where They Make Sense
If you’re building a she-shed or backyard office that visitors will see, and you want a polished look, plastic grids are cleaner than scattered concrete blocks. They also work well in areas where you want minimal ground disturbance.
For pure functionality? You’ll save money with gravel or concrete blocks.
Cost Comparison by Shed Size and Foundation Type
Here’s what different foundation types cost for different shed sizes, fully DIY (materials + tool rental, no labor):
8×10 Shed (80 sq ft)
| Foundation Type | Cost | Notes |
|---|---|---|
| — | — | — |
| Gravel Pad | $200-$350 | Includes tool rental |
| Deck Blocks | $80-$150 | Blocks only; warm climates only |
| Concrete Blocks (pier wall) | $280-$500 | Solid blocks + mortar |
| Skids | $250-$400 | PT lumber runners on gravel |
| Sonotube Piers (36″ frost) | $350-$600 | 6-8 piers, concrete included |
| Concrete Slab (4″) | $600-$1,000 | Includes delivery fee |
10×12 Shed (120 sq ft)
| Foundation Type | Cost | Notes |
|---|---|---|
| — | — | — |
| Gravel Pad | $250-$400 | Includes tool rental |
| Deck Blocks | $120-$200 | 10-15 blocks; warm climates only |
| Concrete Blocks (pier wall) | $350-$600 | Solid blocks + mortar |
| Skids | $300-$500 | PT lumber runners on gravel |
| Sonotube Piers (36″ frost) | $400-$800 | 10-12 piers, concrete included |
| Concrete Slab (4″) | $800-$1,500 | Includes delivery fee |
| Helical Screw Piles | $2,500-$7,200 | 10-12 piles × $250-$600 each |
12×16 Shed (192 sq ft)
| Foundation Type | Cost | Notes |
|---|---|---|
| — | — | — |
| Gravel Pad | $400-$600 | Includes tool rental |
| Concrete Blocks (pier wall) | $500-$800 | More blocks, larger perimeter |
| Sonotube Piers (36″ frost) | $600-$1,100 | 14-16 piers, concrete included |
| Concrete Slab (4″) | $1,200-$2,000 | Includes delivery fee |
Hidden Costs Most Guides Never Mention
Beyond the foundation itself, budget for these:
Site Prep and Materials
- Landscape fabric: $20-$60
- Gravel delivery fee: $75-$150 (on top of material cost)
- Soil excavation and disposal: $75-$200
- Grade and drainage prep: $100-$300
Tools and Equipment Rental
- Plate compactor rental: $75-$150/day
- Concrete mixer rental: $40-$60/day
- Excavator rental (if digging piers): $150-$250/day
Utilities and Planning
- Underground conduit for electrical: $25-$75 (do this before the foundation is done; much harder after)
- Drainage improvements (French drain, swale): $100-$500
- Permit fees: $50-$300
- Inspection fees: $25-$100 (some jurisdictions)
Hidden Installation Mistakes
- Vapor barrier (plastic sheeting): $15-$40 (prevents moisture from soil migrating into wood frame)
- PT lumber for frame: $100-$300 (must be UC4B/Ground Contact rated)
The big one most DIYers miss: “A few pieces of 1-1/2″ to 2″ underground conduit to allow for wire routing into the shed is a LOT easier to do pre-gravel and weed block than after.” —Actual builder quote. Plan for utilities before you build the foundation.
The Foundation Decision Matrix: Which Type for Your Situation
Use this matrix to narrow down which foundation makes sense for you:
Small Shed (<100 sq ft), Flat Yard, Mild Climate
Best: Gravel pad + deck blocks
Cost: $200-$350
Why: Cheapest, fastest, good drainage
Small Shed, Cold Climate (Frost >36″)
Best: Gravel pad floating on grade OR Sonotube piers
Cost: $250-$800
Why: Gravel works if you’re okay with maintenance; Sonotubes prevent frost heave damage
Medium Shed (120-200 sq ft), Any Climate
Best: Gravel pad + PT lumber border + deck blocks OR Concrete blocks
Cost: $300-$600
Why: Good balance of cost and durability; PT lumber extends life; easier to maintain than full slab
Large Shed (200+ sq ft), Cold Climate
Best: Concrete piers below frost line OR Concrete slab
Cost: $600-$3,000
Why: Size requires more structural support; piers or slab prevent settling and frost heave
Workshop with Heavy Equipment
Best: Concrete slab (4-6″ thick, reinforced)
Cost: $1,500-$3,000
Why: Handles point loads; lasts 30+ years; no moisture issues
Sloped Site (>8″ elevation change)
Best: Concrete piers at varying heights
Cost: $800-$1,500
Why: Adjustable; prevents shed from tilting
Flood Zone (Subject to Flooding)
Best: Elevated piers above base flood elevation
Cost: $1,000-$2,500
Why: Required by FEMA; prevents water damage
High Wind Zone (>90 mph winds)
Best: Concrete slab with embedded anchors
Cost: $2,000-$3,500
Why: Secures shed to ground; resists uplift from wind
Temporary / Relocatable Shed
Best: Gravel pad OR Skids on gravel
Cost: $200-$400
Why: No permanent installation; can move later
Premium Budget, Minimal Disruption
Best: Helical screw piles
Cost: $2,500-$7,200
Why: One-day install; removable; no digging
Expansive Clay Soil (Southwest)
Best: Concrete piers below active zone OR Concrete slab
Cost: $800-$2,500
Why: Clay swells/shrinks; piers or slab prevents cracking
Wet Climate (Pacific Northwest, Southeast)
Best: Concrete slab OR Gravel pad with excellent drainage
Cost: $800-$1,500
Why: Slab prevents moisture intrusion; gravel requires perfect drainage management
7 Real Foundation Failures (And How to Avoid Them)
These aren’t theoretical problems. Real people, real sheds, real consequences.
Failure #1: The Utah Sinking Shed
A homeowner in Utah built a gravel pad in what seemed like a level spot. Within two years, the corner closest to a neighbor’s downspout had sunk 2 inches. Water from the roof was pooling there. The gravel settled unevenly.
What happened: No drainage plan. No grading. Just gravel spread on flat ground and hoped.
How to avoid: Grade your site so water slopes away from the shed. A 1-2% slope is minimum. Test it by pouring a bucket of water—watch where it flows.
Failure #2: The Clay-Soil Workshop
A homeowner in Texas built a gravel pad for a workshop on clay soil. The first rainy season, the soil under the pad was saturated. The gravel sank. The shed twisted. Doors wouldn’t close. The frame cracked.
What happened: Clay doesn’t drain. Gravel alone can’t fix that. Water sat under the shed, the soil beneath became soft, and everything settled unevenly.
How to avoid: Clay soil + gravel = drainage failure. Use a concrete slab instead, or a gravel pad with a French drain system that actively moves water away.
Failure #3: The Unframed Gravel Pad
A budget-conscious builder spread gravel directly under a shed with no PT lumber frame. Within six months, the gravel had scattered everywhere. The shed was sitting on irregular lumps of stone.
What happened: Gravel naturally spreads when you walk on it or set weight on it. You need a lumber frame to contain it and distribute the shed’s weight evenly.
How to avoid: Always build a PT lumber frame (4×4 or 4×6 runners) on the gravel pad. It constrains the gravel and provides a proper bearing surface.
Failure #4: The Hollow Cinder Block Disaster
A Midwest builder stacked hollow cinder blocks to create a pier wall. After one winter: the blocks had frost-heaved, sunk unevenly, and the shed was twisted. Water had collected inside the hollow cores and frozen.
What happened: Hollow blocks are water traps. Water fills them in fall, freezes in winter, expands, and cracks the block. Plus, hollow cores provide almost no bearing capacity.
How to avoid: Use solid concrete blocks (sometimes called cap blocks). Yes, they cost more per block. Essential.
Failure #5: The Idaho Untreated Lumber Shed
A builder in Idaho used standard lumber (not pressure-treated) in ground contact under a shed. A community forum contributor spotted it: “That PT lumber isn’t rated for ground contact. Predict 3-8 year failure.” Five years later, the sill beam had rotted and the shed was sagging.
What happened: The lumber tag said “PT” but it was Above Ground rated (ACQ), not Ground Contact rated (UC4B). In ground contact, it lasted exactly as predicted.
How to avoid: Check the lumber tag. It will clearly state UC4B or Ground Contact if it’s rated for soil contact. If it doesn’t say that, don’t use it in ground contact.
Failure #6: The Red-Tag Foundation
A homeowner built a shed without a permit or foundation inspection. A neighbor complained. The city sent an inspector. The foundation didn’t meet code. The shed was red-tagged. The homeowner had to hire a contractor to retroactively install a proper foundation. Cost: $2,500. Timeline: 6 weeks to resolve.
What happened: Unpermitted work. No inspection. Non-compliant foundation.
How to avoid: Check with your local building department before you start. Some shed sizes don’t require permits or inspections. Some do. Know the rules for your area.
Failure #7: The Infinite Fine Spiral
A commercial shed builder in a jurisdiction that required permitted foundations ignored the requirement. The city issued fines. The builder challenged. Fines went to $100,000 before the court finally reduced it to $3,000. The saga took three years.
What happened: Ignored local code requirements. Assumed they wouldn’t be caught or didn’t matter.
How to avoid: Know your local code. Comply. It’s cheaper than fighting.
Regional Guidance: What Actually Works Where
Foundation needs vary dramatically by region. Here’s what works in your climate:
Northeast and Upper Midwest (Maine, Vermont, Wisconsin, Minnesota, Minnesota, etc.)
Climate: Hard freezes, frost lines 36-48 inches deep, freeze-thaw cycles.
Best choice: Sonotube piers below frost line OR Concrete slab
Why: Frost heave is a major problem. If your foundation doesn’t go below the frost line, frozen ground will lift it in winter and let it settle unevenly in spring. This happens every year. After a few years, your shed is tilted.
Sonotube piers are the economical solution ($400-$800). Concrete slab is the premium solution ($1,500-$3,000) but lasts 30+ years and solves frost heave permanently.
What doesn’t work: Deck blocks alone, gravel pads without structural support in shallow soil.
Grading note: Everything freezes, so water drainage matters less in winter. But spring thaw brings water problems. Make sure your grading slopes away from the shed.
Southeast and South (Georgia, Florida, Louisiana, Texas below 35° latitude)
Climate: Mild winters, high humidity, termite presence in many areas.
Best choice: Gravel pad OR Concrete slab
Why: No frost heave means simpler foundations. But moisture and termites are concerns. Gravel pads work fine, but you need to follow pressure-treatment best practices (UC4B lumber, vapor barrier). A concrete slab eliminates ground contact entirely and is the smarter choice if termites are active in your area.
What works: Deck blocks are fine here since frost isn’t a problem. Plastic grid systems work. Ground screws work.
Termite note: If termites are present, a concrete slab is worth the premium ($1,500-$3,000) to avoid ground contact entirely.
Pacific Northwest (Washington, Oregon, Northern California Coast)
Climate: Wet (rain year-round), moderate frost lines (12-24 inches), moss and mold concerns.
Best choice: Concrete slab OR Sonotube piers with excellent drainage
Why: Rain is relentless. Gravel pads work but need careful grading and regular maintenance. A concrete slab with proper drainage is the premium choice. Moisture under the shed is the enemy.
Frost heave isn’t as severe as the Northeast, but winter wetness is. Drainage is priority #1.
What doesn’t work: Poorly-drained gravel pads (they become mud). Untreated lumber in ground contact (rots fast in moisture).
Drainage note: Install a French drain or swale system around the perimeter if you go gravel. Redirect water aggressively.
Southwest (Arizona, New Mexico, Southern Nevada, West Texas)
Climate: Dry, clay soils prone to expansion and contraction, intense sun, minimal frost.
Best choice: Concrete slab (preferred) OR Sonotube piers
Why: Clay soils swell when wet and shrink when dry. This shifting is brutal on foundations built on gravel or loose blocks. Settling, cracking, and tilting are common with gravel foundations in clay.
A concrete slab that extends slightly below the active soil layer (but above frost line, since frost isn’t a major concern) works best. Gravel pads can work if you’re very careful with grading and accept that you’ll need maintenance.
What doesn’t work: Gravel pads on clay (they tilt and settle). Deck blocks on clay (same issue).
Ground screw note: These are becoming popular in the Southwest because they anchor deep and avoid the moisture/expansion issues of shallow foundations.
Moderate Climates (Mid-Atlantic, California Coast, Southern Arizona Highlands)
Climate: Mild winters, frost lines 24-36 inches or none at all, moderate rainfall.
Best choice: Gravel pad OR Concrete blocks
Why: Mild winters mean simpler foundations. Frost heave isn’t critical (except in higher elevations). Go with gravel if you’re budget-conscious. Upgrade to concrete blocks or a slab if you want something more permanent.
What works: Almost everything. You have the most flexibility. Cost and preference matter more than climate constraints.
Pressure-Treated Lumber: The Specification You Can’t Miss
Any wood in contact with soil or ground needs to be pressure-treated. But not all PT lumber is the same.
Ground Contact (UC4B or CA-B): This is what you need for shed frames, skids, and any wood touching soil. The tag will clearly say “Ground Contact” or “UC4B.”
Above Ground (ACQ, CCA): Do NOT use this for ground contact. It will fail in 5-8 years.
This is the single most commonly missed specification in shed building. Buy UC4B. Check the tag before you leave the store.
Drainage: The Invisible Hero
Most foundation failures trace back to water management, not the foundation type itself.
Grade Your Site
Water should slope away from the shed at least 1-2%. Test it: pour a bucket of water at the high point and watch where it flows. If it pools near the shed, your grading is wrong.
Install Landscape Fabric
Prevents weeds from growing up through gravel and keeps crushed stone from mixing with soil.
Consider a French Drain
For wet climates or clay soil, a simple perimeter French drain moves water away from the foundation. Cost: $100-$500. Often worth it.
Vapor Barrier
For any foundation, lay a vapor barrier (plastic sheeting or tar paper) between the foundation and your wood frame. This slows moisture migration from soil to wood and extends frame life by years.
Utilities: The Underground Planning You’ll Regret Skipping
Plan for electricity, water, drainage, or other utilities before you build the foundation.
Underground conduit: Run 1.5-2″ PVC conduit from your main electrical panel to the shed location before you pour concrete or spread gravel. This is trivial to do during site prep. It’s a nightmare to do after.
Cost: $25-$75 for conduit and fittings. Time: 30 minutes.
Do this. You’ll thank yourself later.
Permit Requirements: Know Before You Build
Foundation requirements vary by jurisdiction. Some don’t require permits for small sheds. Some do.
Call your local building department. Takes 15 minutes. Know:
- Do you need a permit for your shed size?
- Does your foundation need inspection?
- What are the frost line requirements for your area?
- Are there setback requirements (distance from property lines)?
Your Decision Framework
Don’t get paralyzed by options. Use this framework:
- Know your frost line. Call your local building department. This determines your foundation depth.
- Know your soil and drainage. Is it clay? Does water pool? Do you have slopes?
- Know your budget. $300 gravel pad vs. $2,000 slab vs. $5,000 screw piles.
- Know your timeline. Need it done this weekend? Go gravel or skids. Can wait a month? Sonotubes or concrete slab.
- Match foundation to your situation using the decision matrix above.
- Execute properly. Whether it’s gravel or concrete, do it right the first time. Fixing it later costs more.
Your Next Steps
- Call your county extension office or building department. Ask about frost line depth, soil type, and local code requirements. (Takes 15 minutes.)
- Use our foundation cost calculator to compare options for your exact shed size and climate.
- Explore our from-scratch calculator if you’re building from the ground up.
- Browse our kit calculator if you’re considering a pre-built kit.
- Review our shed types guide to see which foundation pairs best with your shed style.
- Take our quick shed quiz if you’re still deciding what kind of shed makes sense.
- Check our permits guide to understand local requirements.
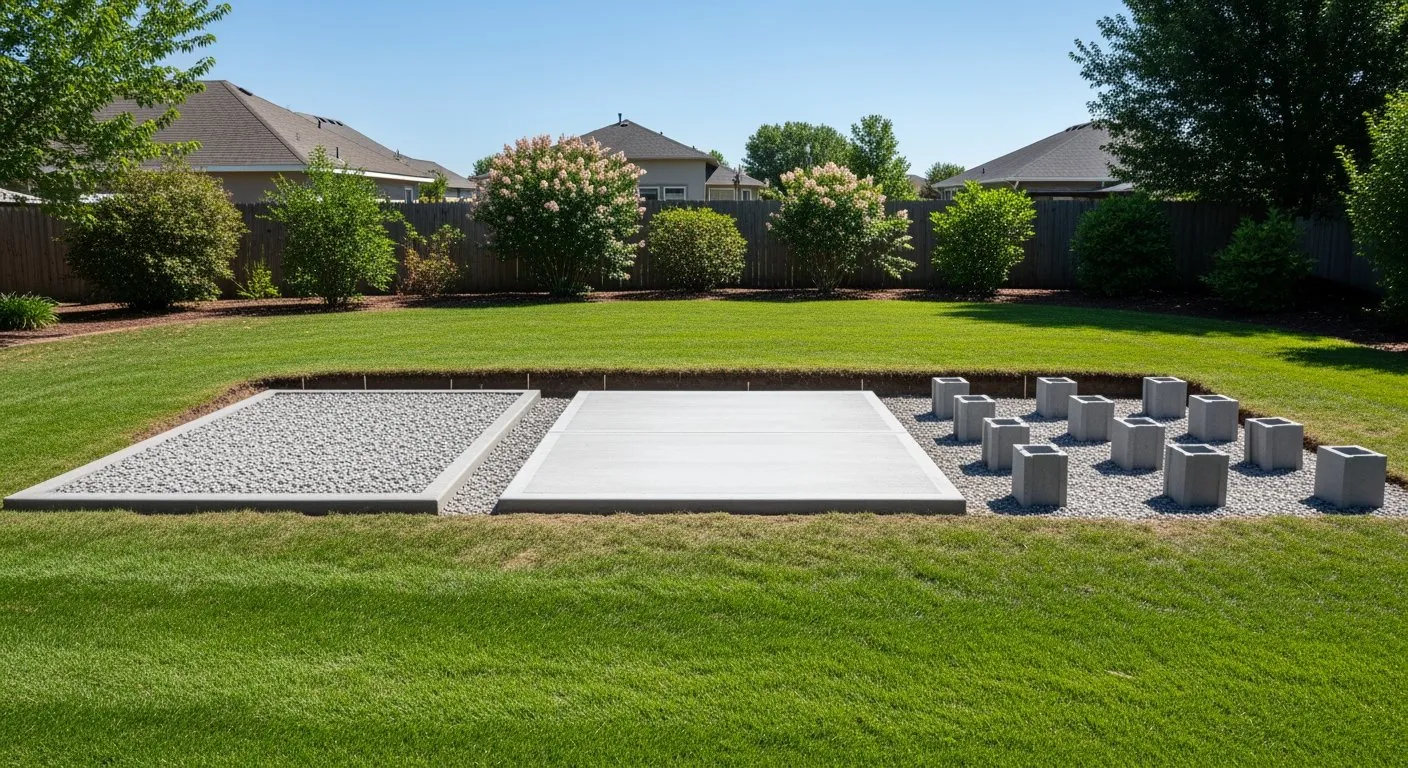
Wide shot showing multiple foundation types side by side (gravel pad, concrete slab, sonotubes, deck blocks) for visual comparison
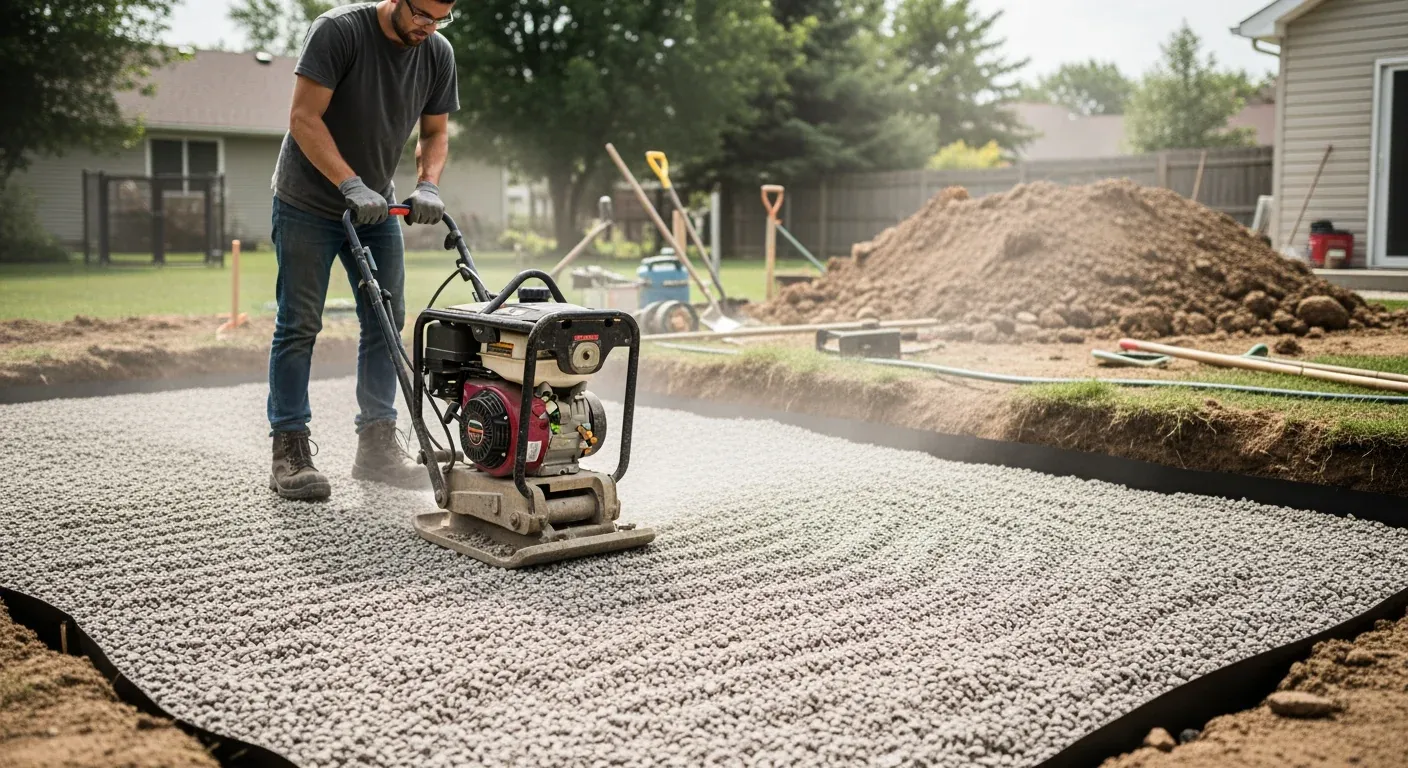
Diagram showing how frost heave works: ground freezes and expands, lifting an unsupported foundation, then settles unevenly in spring
Visual bar chart comparing costs of different foundation types for 10×12 sheds, by climate zone
Close-up photo of a PT lumber tag showing the UC4B Ground Contact rating clearly visible
Final Thought
Building a shed is genuinely doable if you get the foundation right. And now you have the information to choose wisely—not just more options to paralyze you.
You know which foundation works for your climate. You know what it costs. You know what mistakes to avoid. You know how to execute properly.
Stop searching. Choose. Build. Done.
Questions about your specific site or climate? Drop a comment below. Or check out our full resource library at ShedScout.com. We’re here to help you build better.